Join me on an exciting journey as I share the complete transformation of our master bedroom, filled with DIY projects and budget-friendly tips. With a little creativity and resourcefulness, you too can create a cozy and stylish space without breaking the bank!
Welcome to the Makeover Journey
Welcome to our exciting bedroom makeover journey! This project has been a labor of love, filled with creativity and resourcefulness. We aimed to transform our space into a cozy retreat that reflects our style without emptying our wallets. Get ready to dive into the details of our DIY projects and budget-friendly hacks!
The Before: A Room in Need of Love
Before the transformation, our bedroom had its charm but lacked intentionality. We had a mix of secondhand furniture and decor collected over the years. It was time to refresh the space and bring in some warmth and cozy earthy tones that truly resonate with us.
Starting the Makeover: A Budget-Friendly Approach
One of the first steps in our makeover was to sell any furniture and decor we no longer used. This allowed us to reinvest that money into new items that fit our vision for the space. I focused on sourcing materials from thrift stores, especially the Goodwill Outlet, where I found incredible deals.
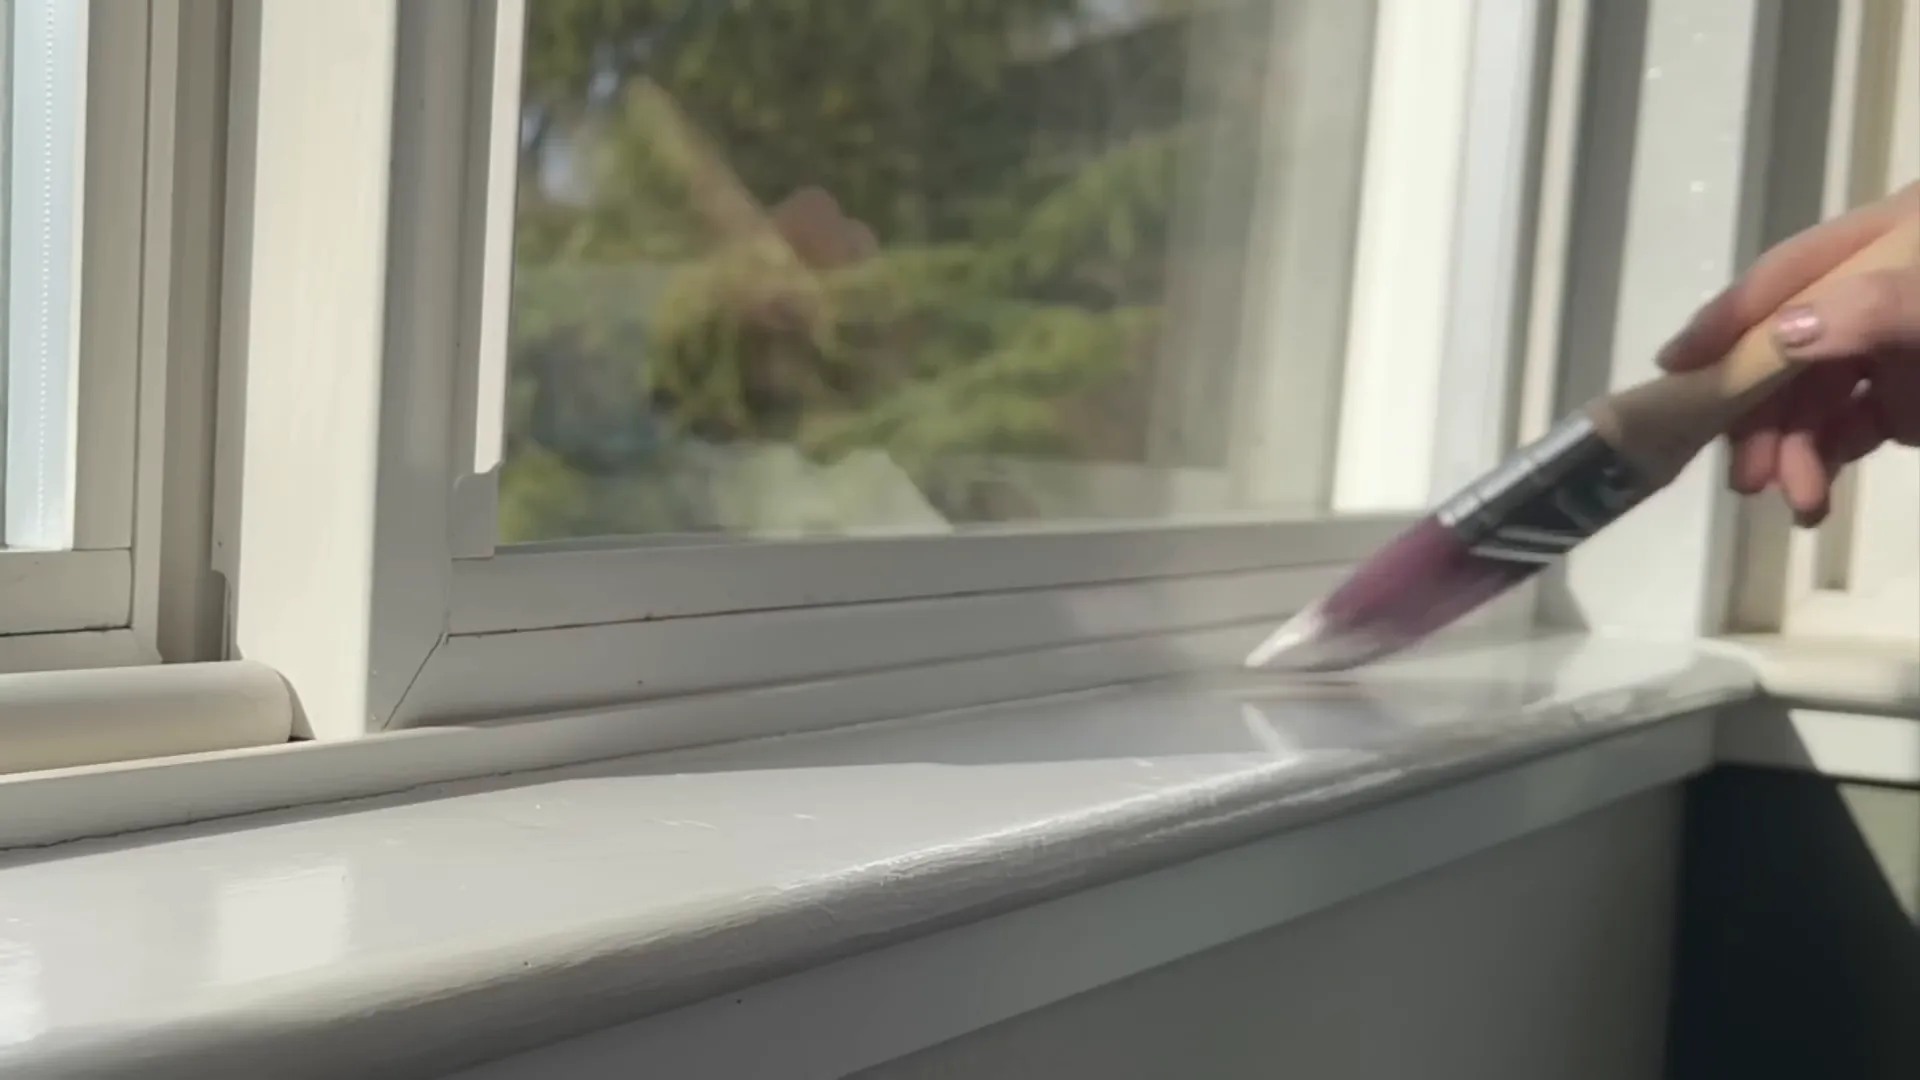
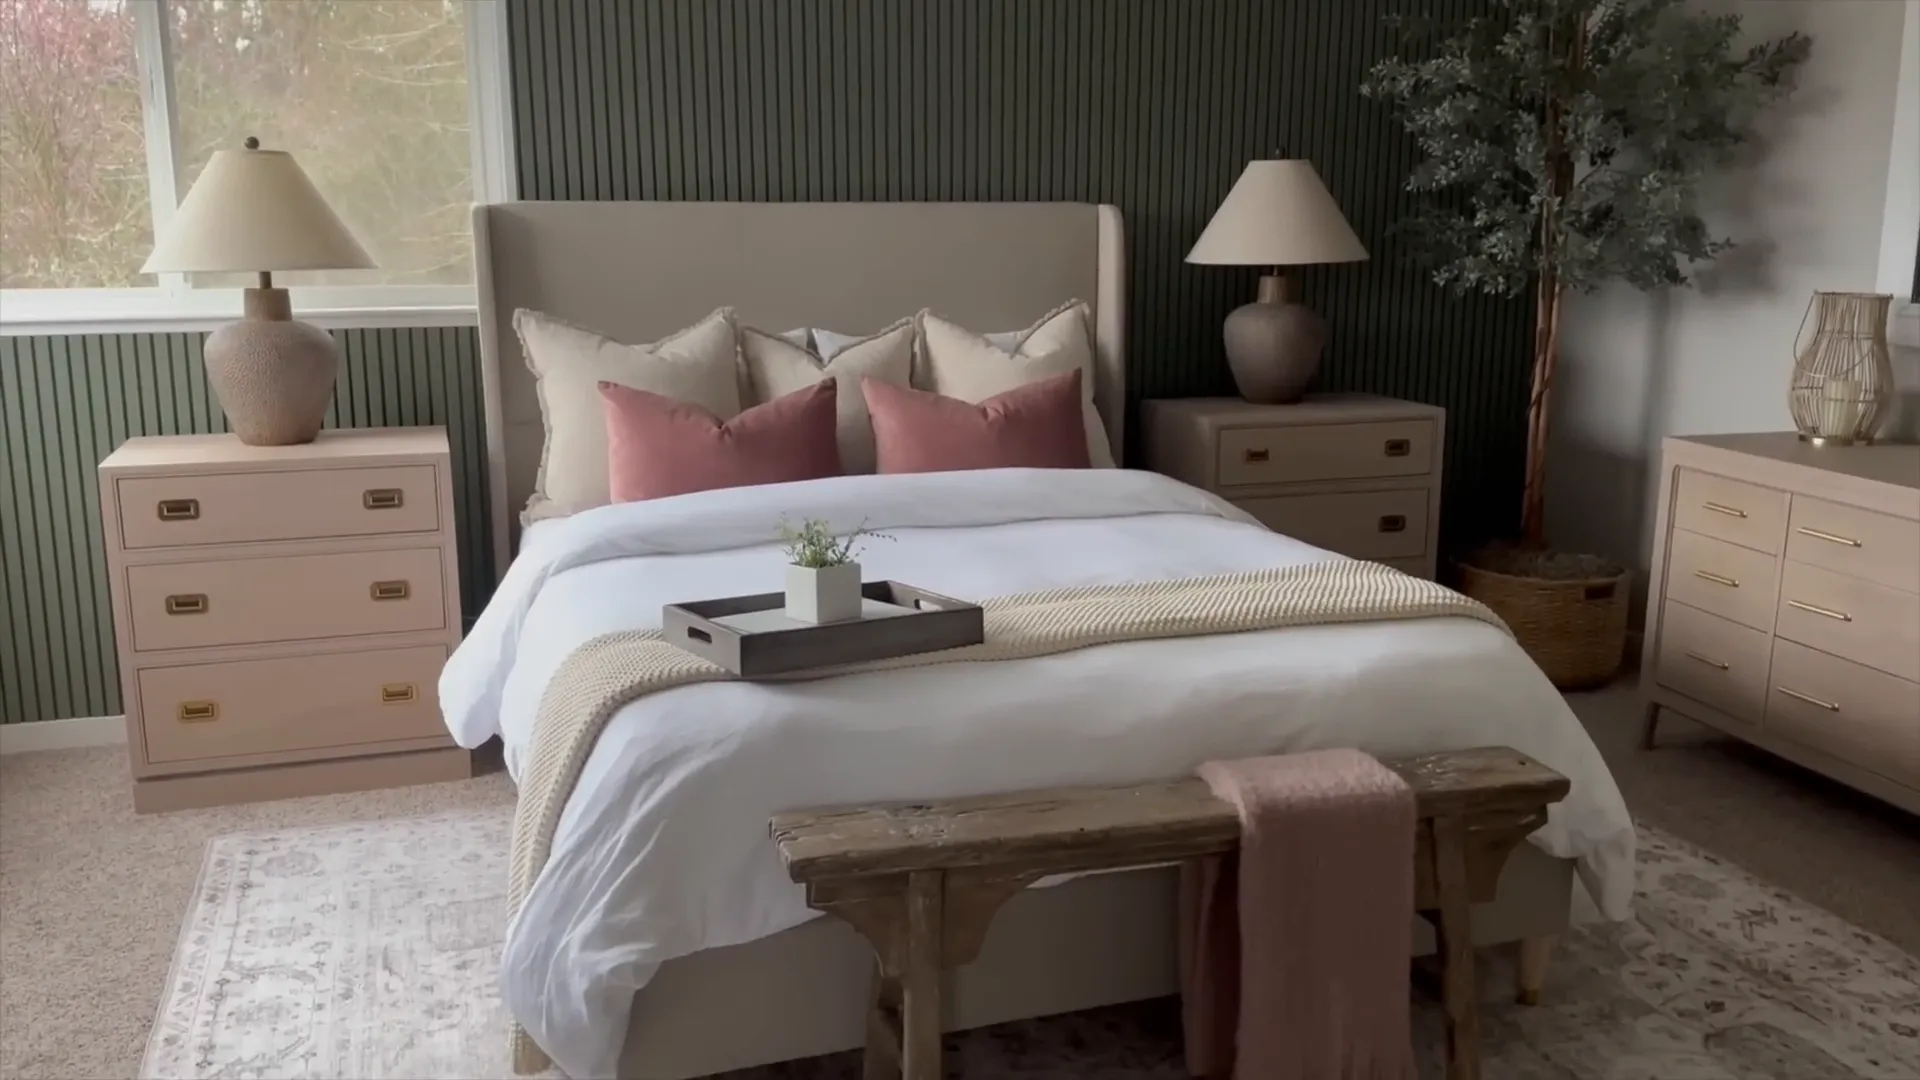
Faux Wrapped Windows: Elevating the Look
To enhance the windows, I wanted a wrapped look but didn’t want to spend too much. I achieved this by painting the interior casing to match the trim. This simple trick elevated the windows significantly without the cost of traditional wrapping.
Creating a DIY Slat Wall
Next up was the slat wall behind the bed. Instead of ordering pre-made slats, we opted for plywood, which we cut using a track saw. This decision not only saved time but also allowed for a custom design tailored to our space.

Installing the slats created a clean, structured look that complemented the faux wrapped windows. It was essential to ensure everything was level and properly spaced to avoid any mishaps with electrical or plumbing behind the wall.
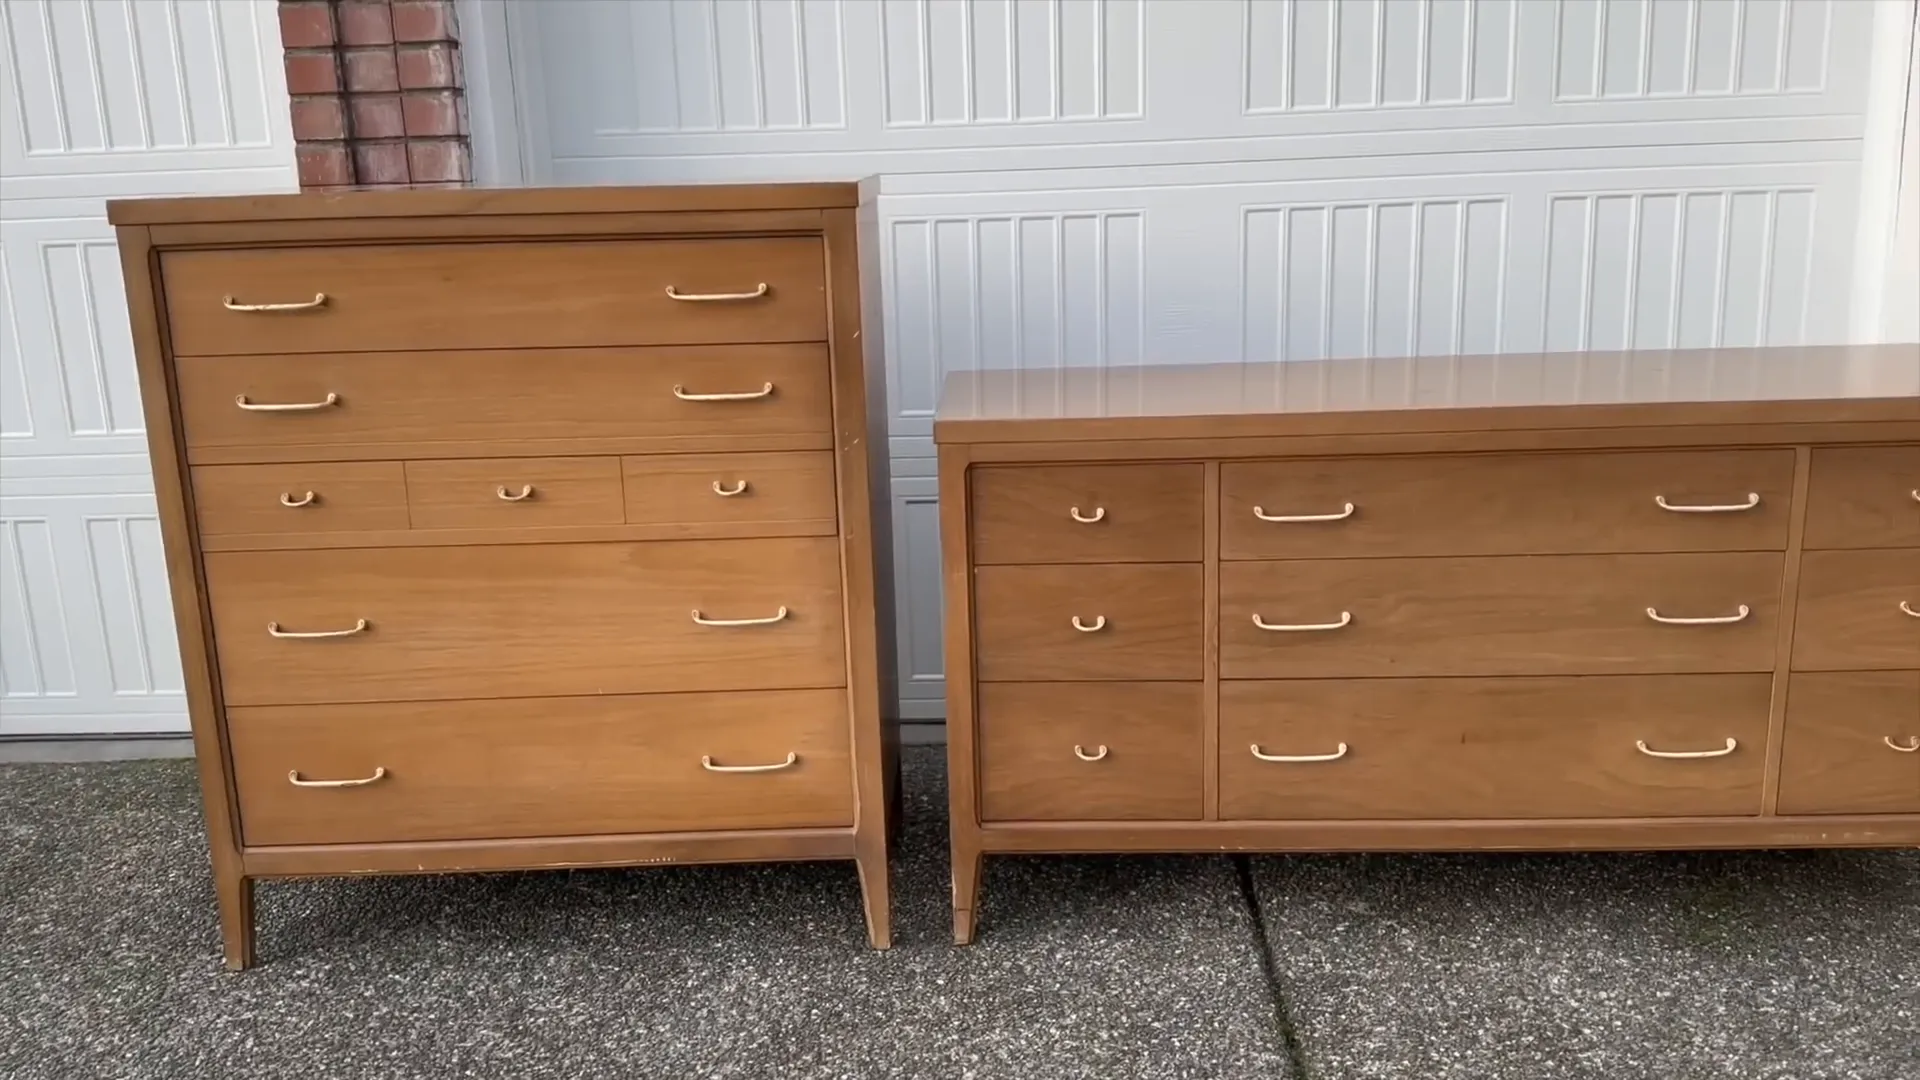
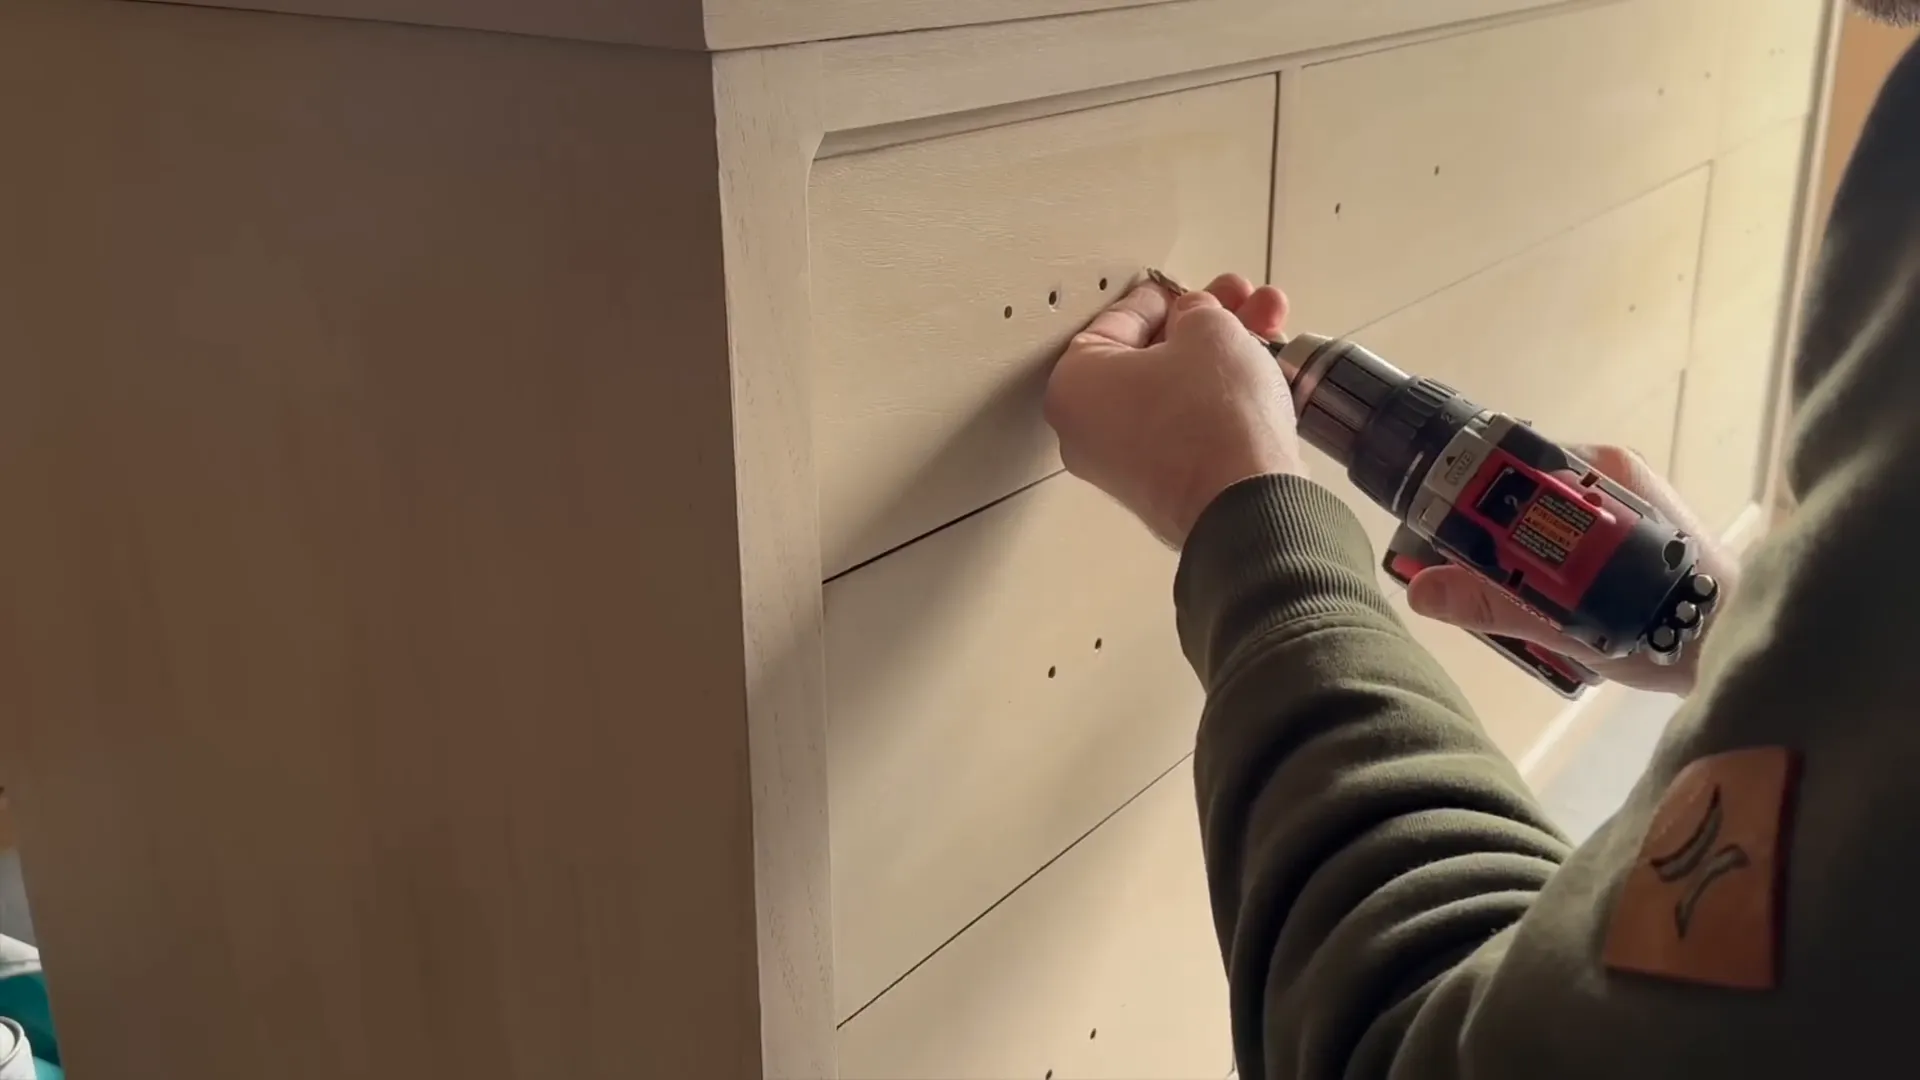
Dresser Makeover: Reviving Old Furniture
For the dresser, I found a beautiful piece on Facebook Marketplace. While it had some wear, it had great potential. I chose a wash technique to enhance the wood's natural grain while eliminating any unwanted orange tones from the finish.
After applying the wash, I filled in any minor damages with walnut wood filler mixed with the wash to ensure a seamless look. This method allowed me to maintain the character of the piece while giving it a fresh new feel.
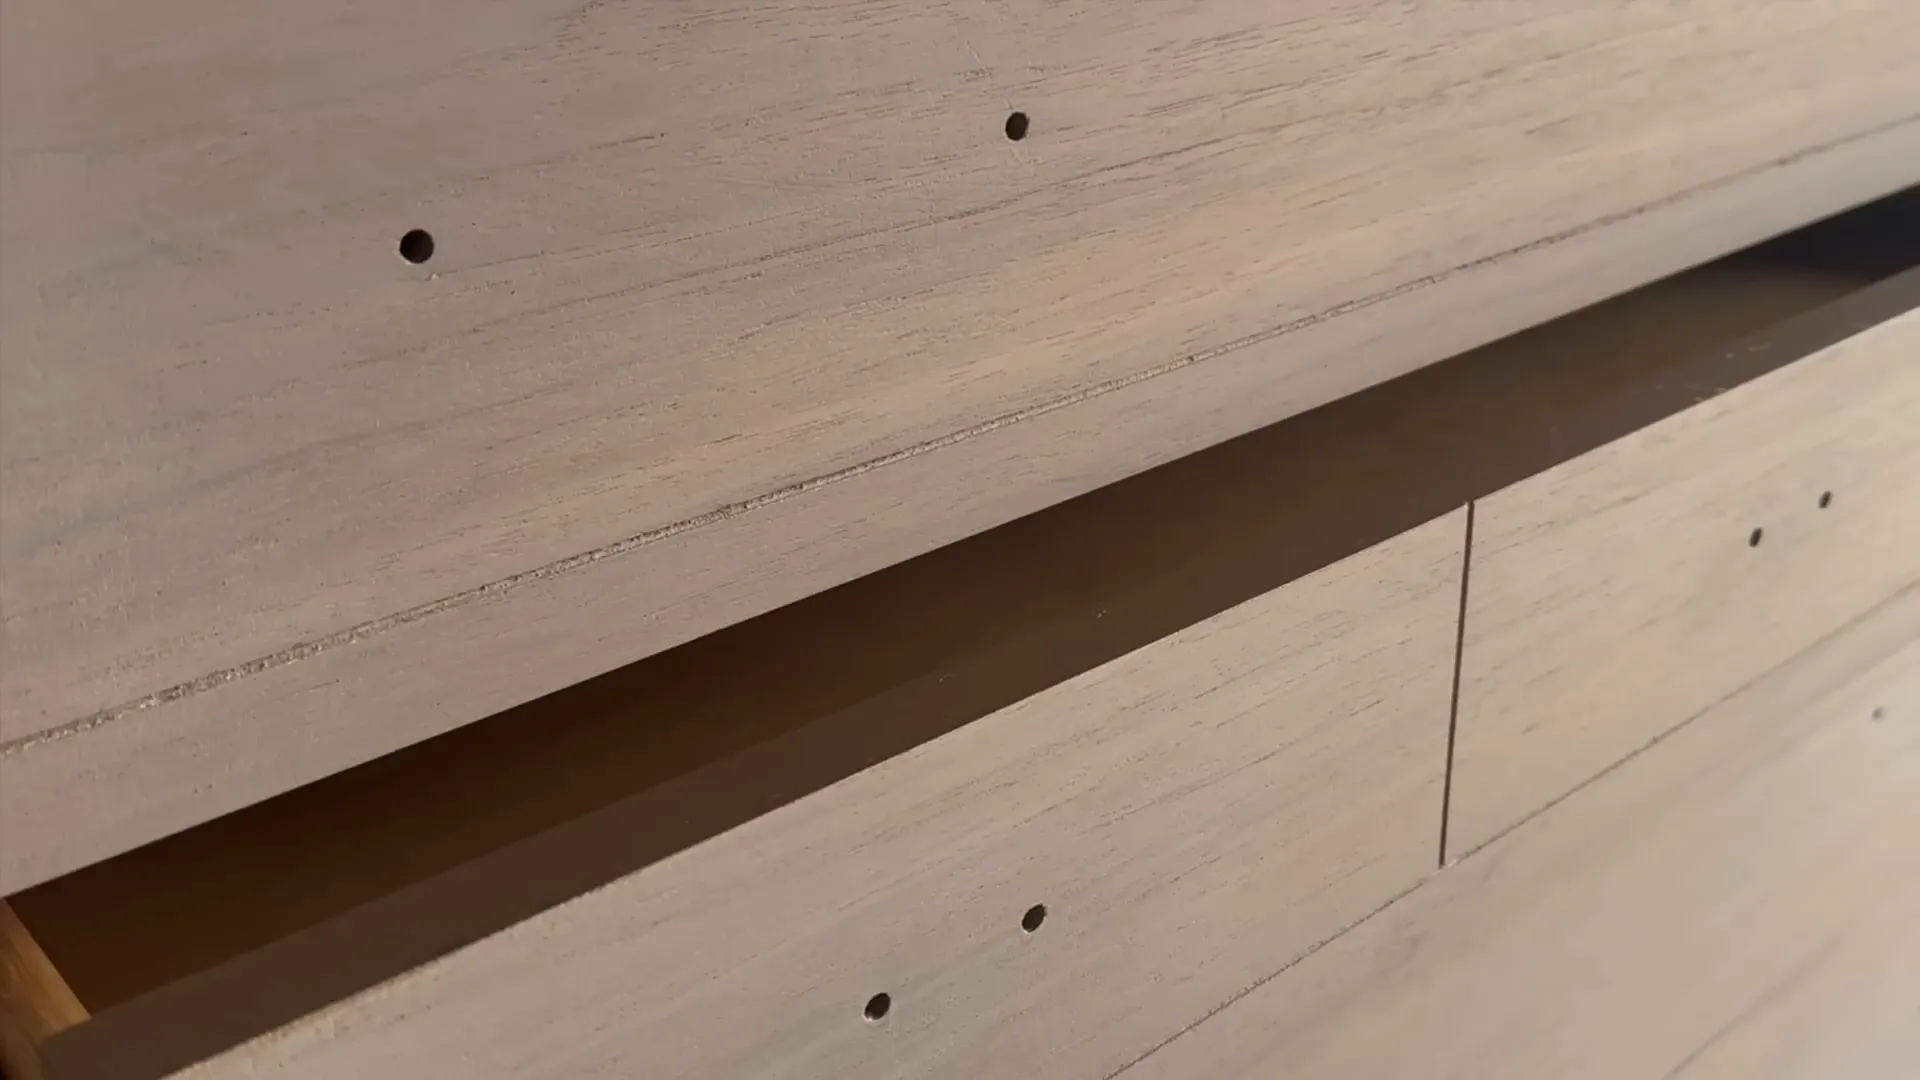
Finding hardware that matched the existing holes proved to be a challenge due to the age of the dresser. However, I was able to locate knobs that fit perfectly, adding the final touch to our revived furniture piece.
Luxury Meets Affordability: Introducing Brooklinen
I'm a firm believer in finding that perfect balance between luxury and affordability. That's why I was thrilled when Brooklinen offered me one of their bestselling bundles, the Lux Satin Move-In Bundle. This collection is designed to elevate your bedroom experience without costing a fortune.
First up, we have a stunning Mulberry silk sleep mask—so pretty and perfect for a touch of elegance. The bundle also includes two pillowcases. One of my favorite things about Brooklinen is that their sheets get softer with each wash, providing that cozy feel every night.

Next is the duvet cover. I opted for classic white, but Brooklinen offers over 20 colors and patterns to match any style. The core sheet set comes with a flat sheet, a fitted sheet, and two additional pillowcases. Plus, I chose an all-season down alternative comforter that caters to different needs.

Brooklinen has generously provided a special offer of $20 off any order over $100. Just click the link in the description and use the code Tiffanygmer to redeem this fantastic deal. Investing in quality pieces like these can truly transform your space into a luxurious retreat.
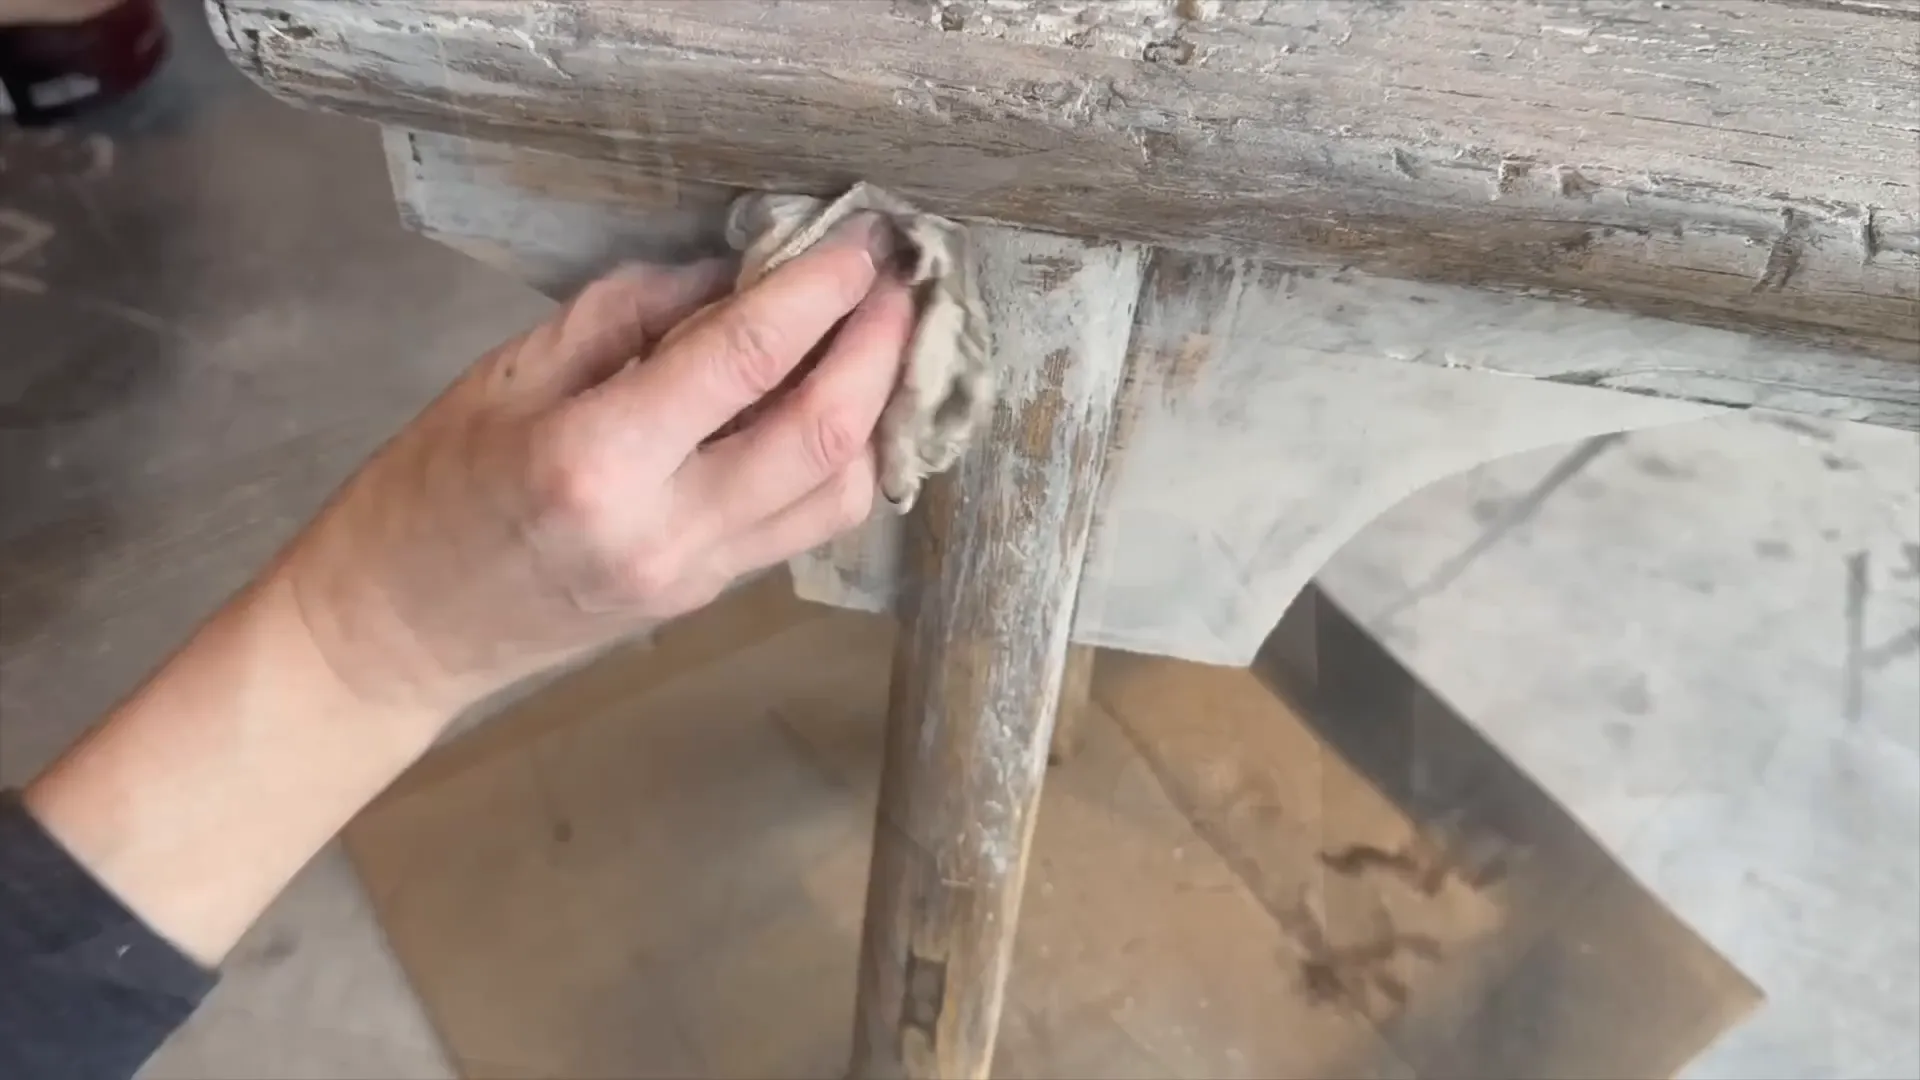
Finding the Perfect Bench: Thrifting Success
When designing my room, I envisioned an antique-looking bench at the foot of the bed. Initially, I considered building one, but then I stumbled across a gem on Facebook Marketplace. The price was just slightly more than the materials would have cost me to DIY.
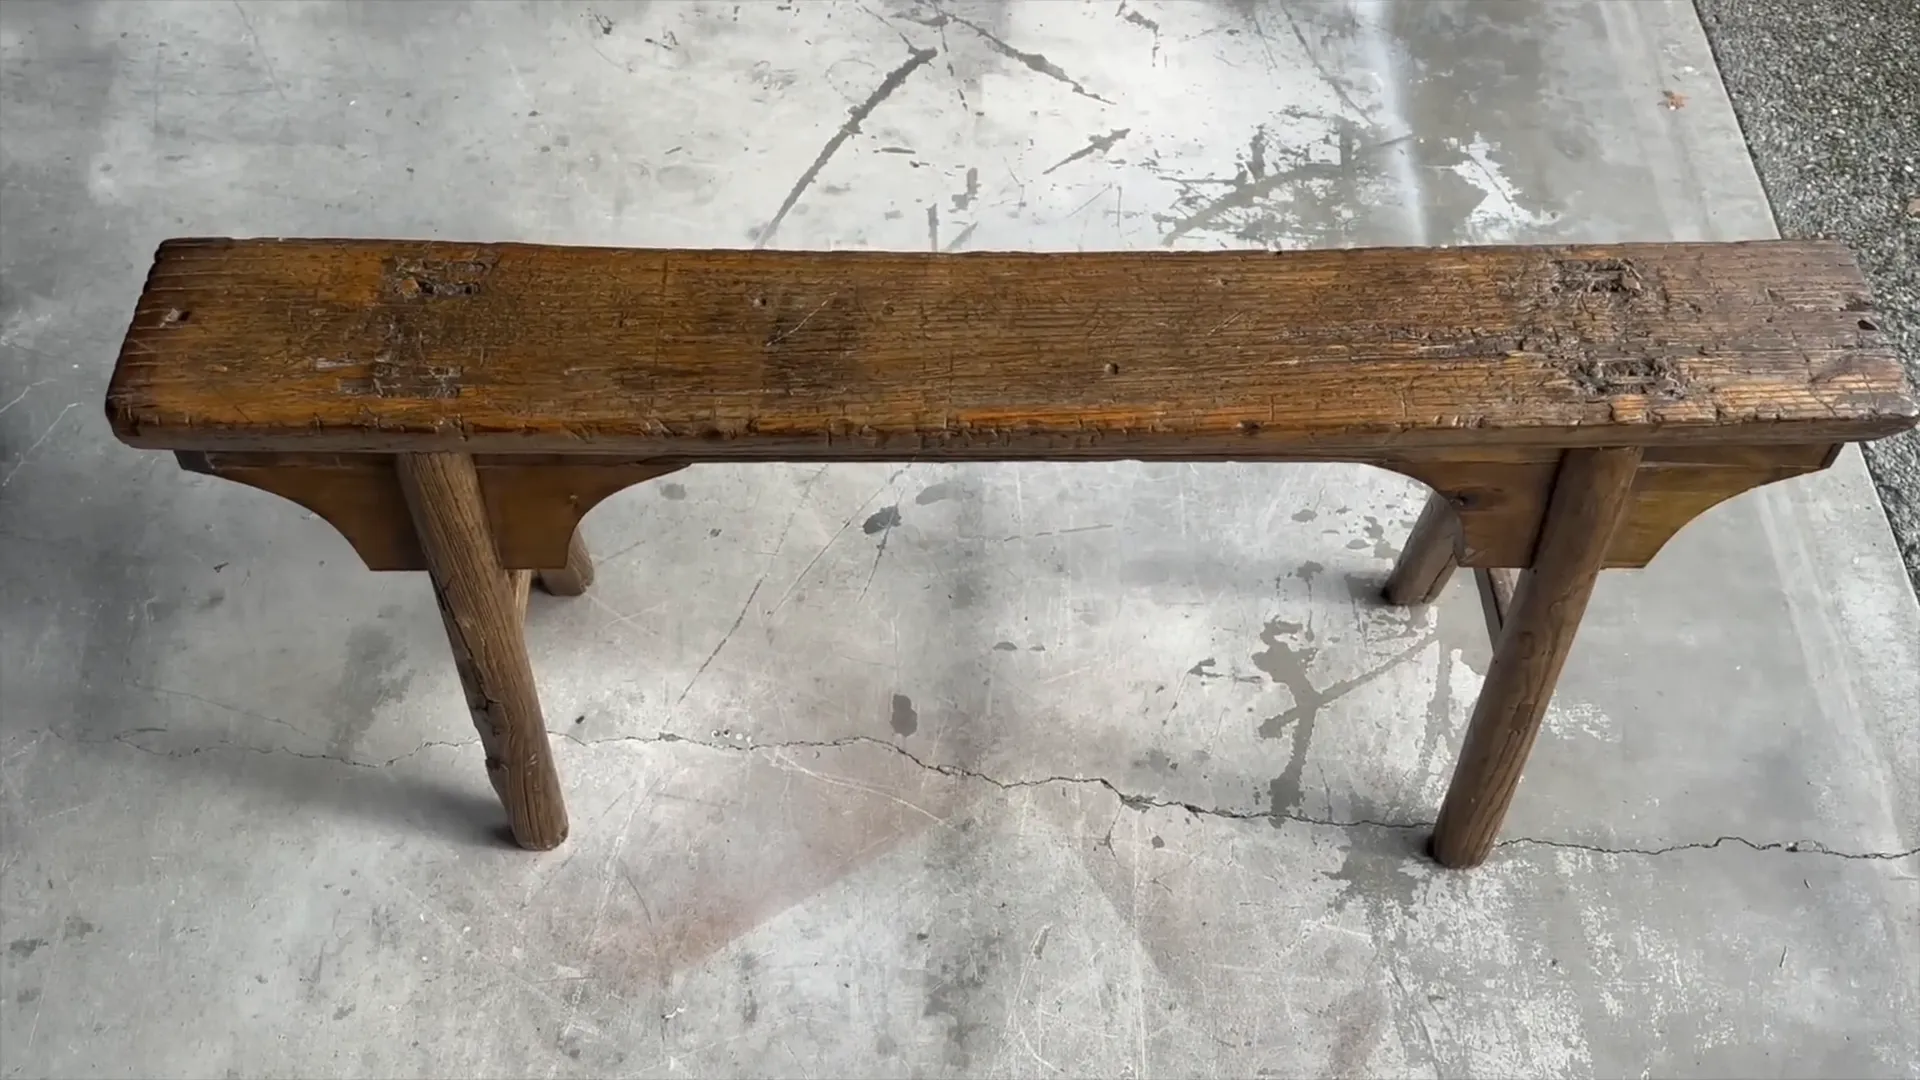
The only downside? The varnish on it. It didn’t fit the aesthetic I was going for, so I decided to remove it. This step was crucial in achieving the rustic look I desired.
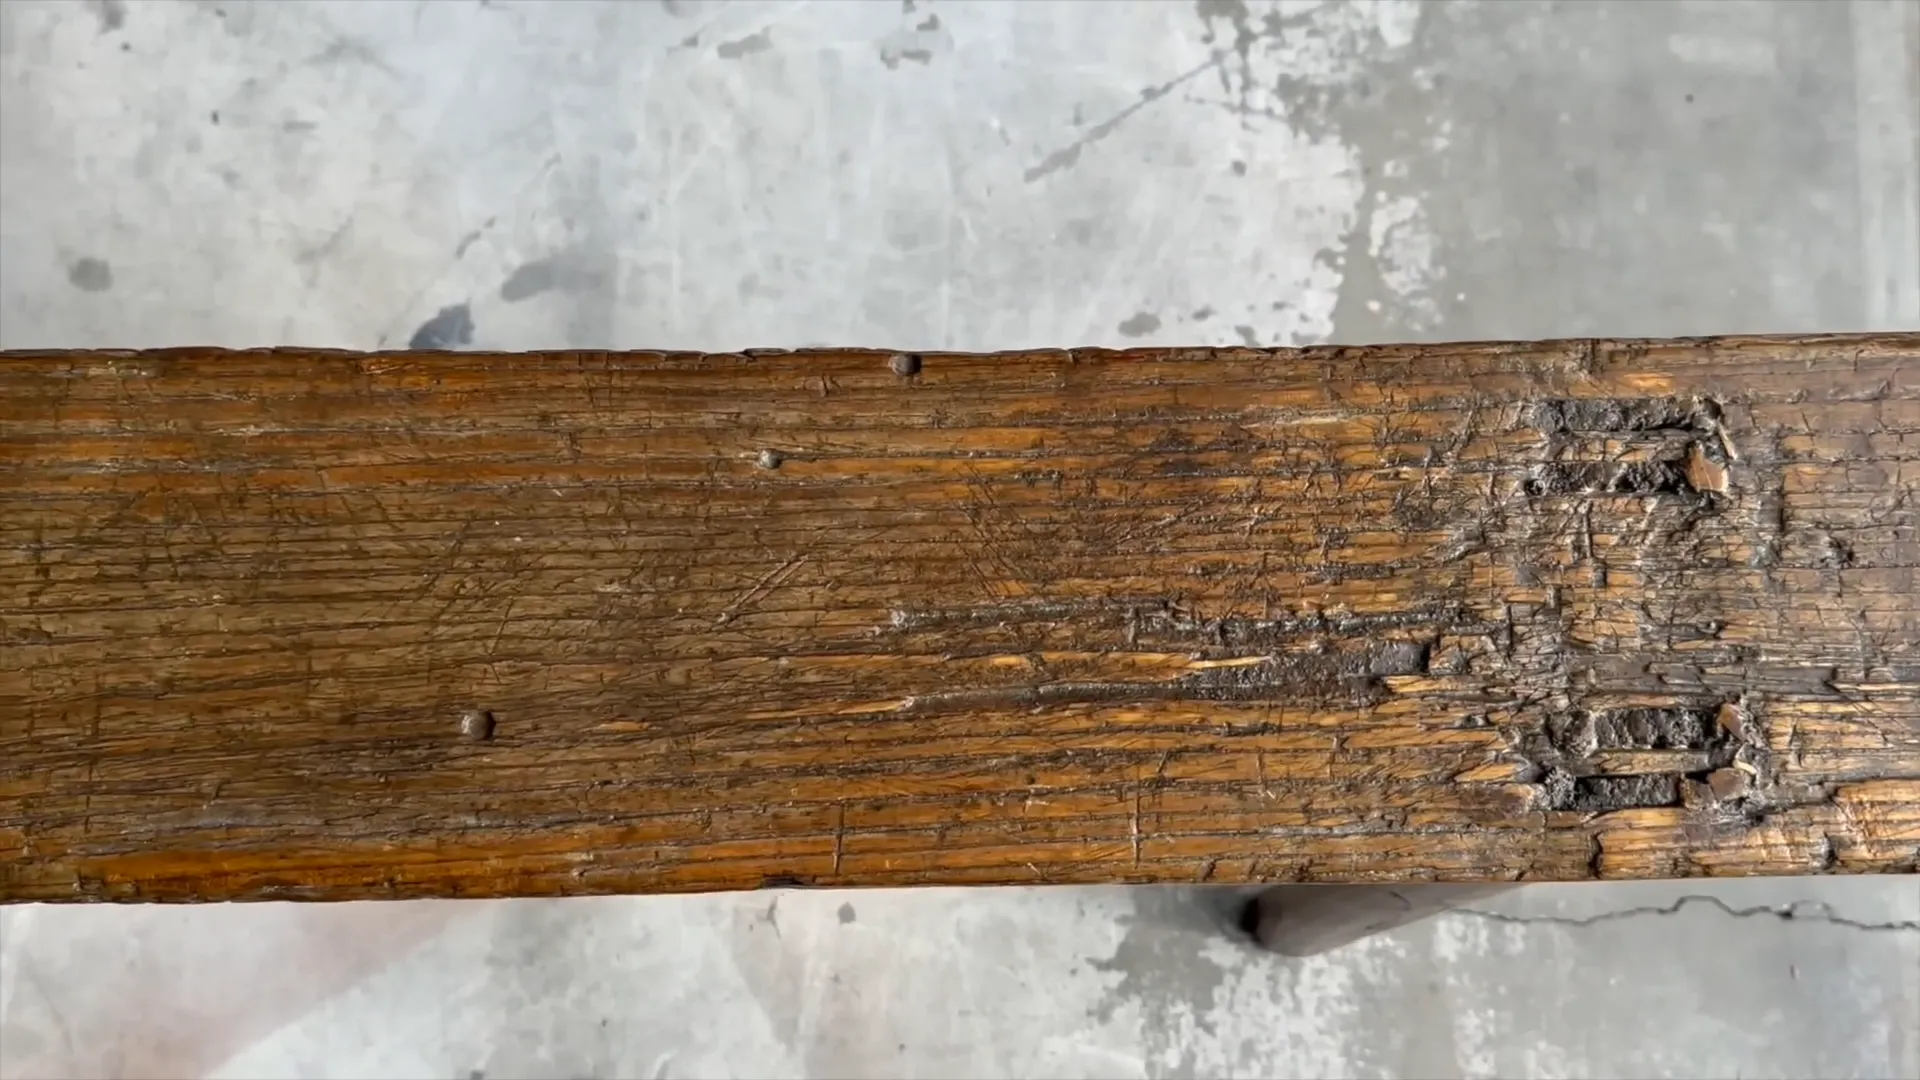
After stripping the varnish, I applied a wash to enhance the natural wood tones. It’s amazing how a simple wash can bring out the beauty of different wood types. I finished with a brown finishing wax for added depth.
Transforming an Artificial Tree
I've always admired decorative trees but found the high-quality ones to be quite pricey. So, when I discovered this artificial tree at a thrift store for just $7.99, I knew I had to get creative.
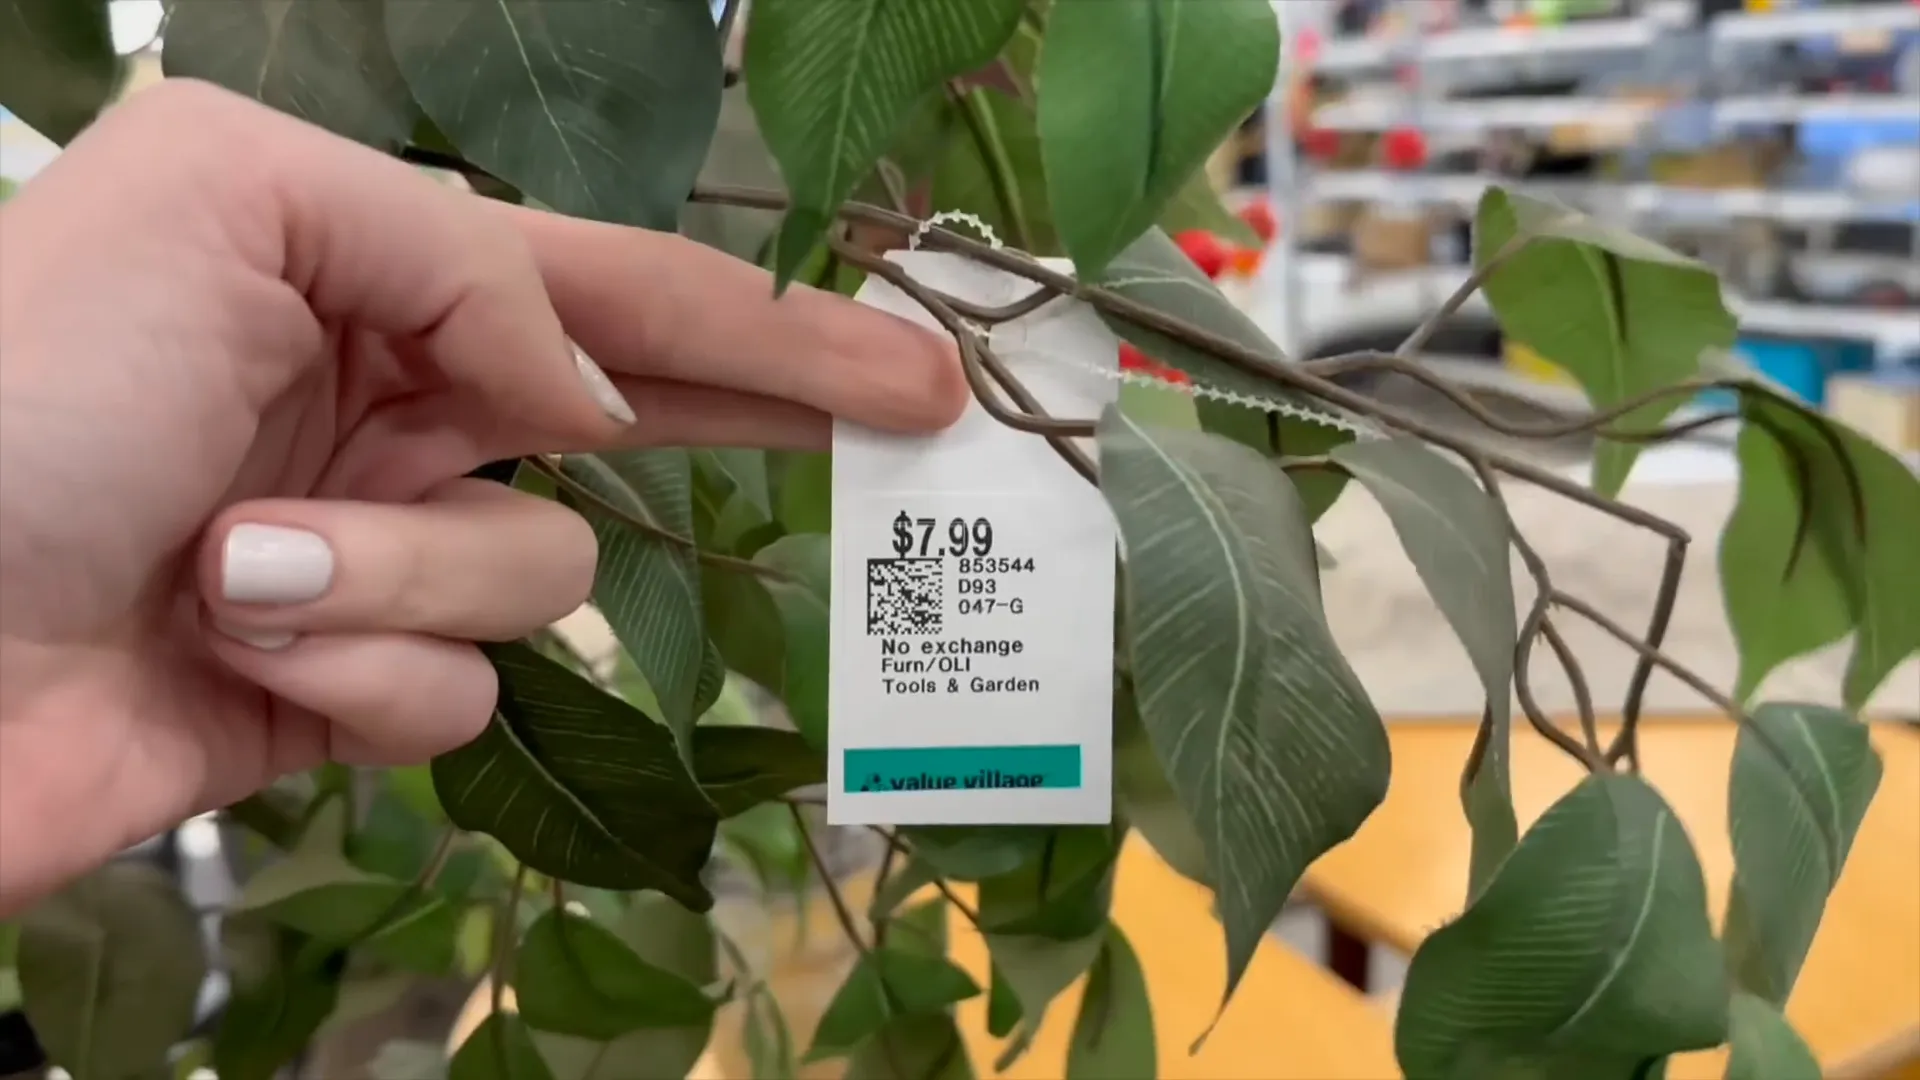
Initially, I planned to use olive branches for a trendy olive tree look, but once I got to Hobby Lobby, I was drawn to different branches that would better suit my vision. It’s all about finding the right elements to bring your idea to life!

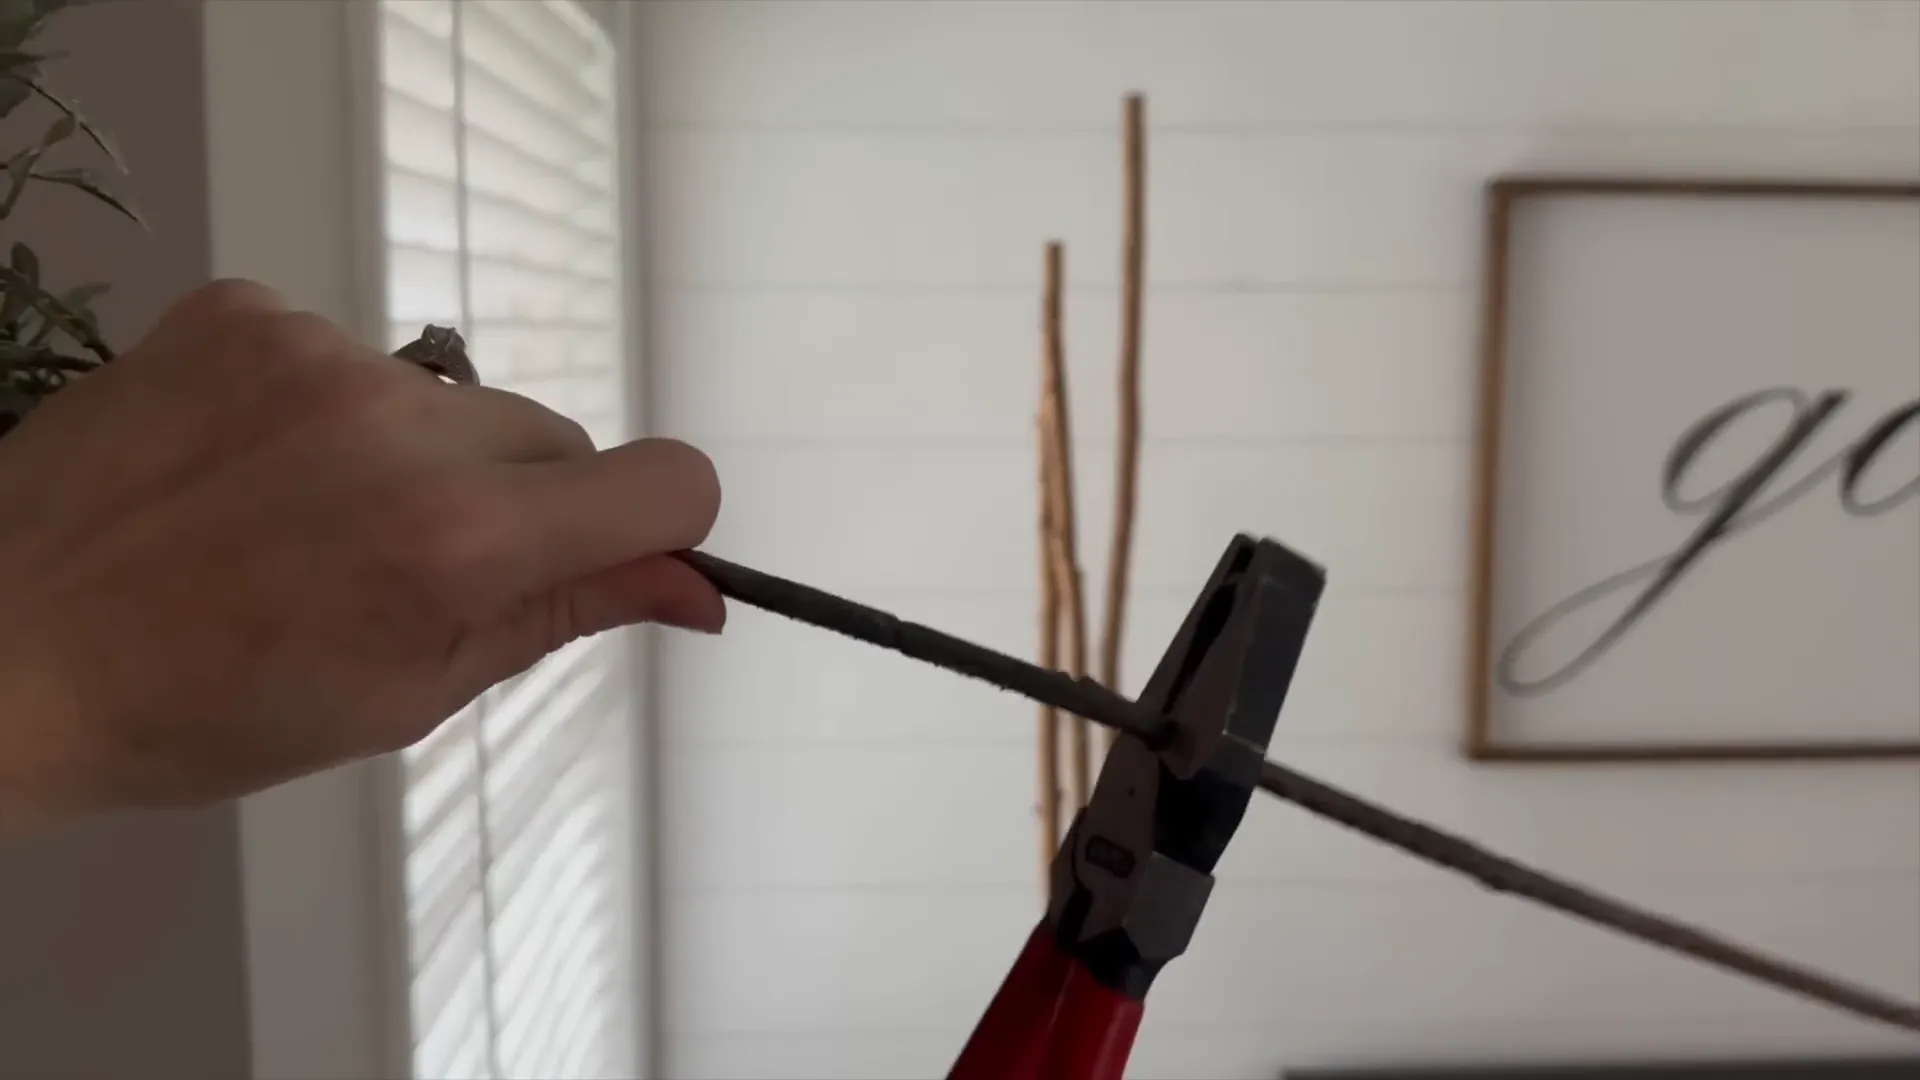
If you're just starting your DIY journey, I can’t recommend a good pair of combination pliers enough. They're versatile and incredibly useful for various projects. Make sure to have them in your toolkit!

Using the cutters, I scored around the outer layer of the tree’s base to expose the wire. This allowed me to create a more natural look and customize it to fit my space.
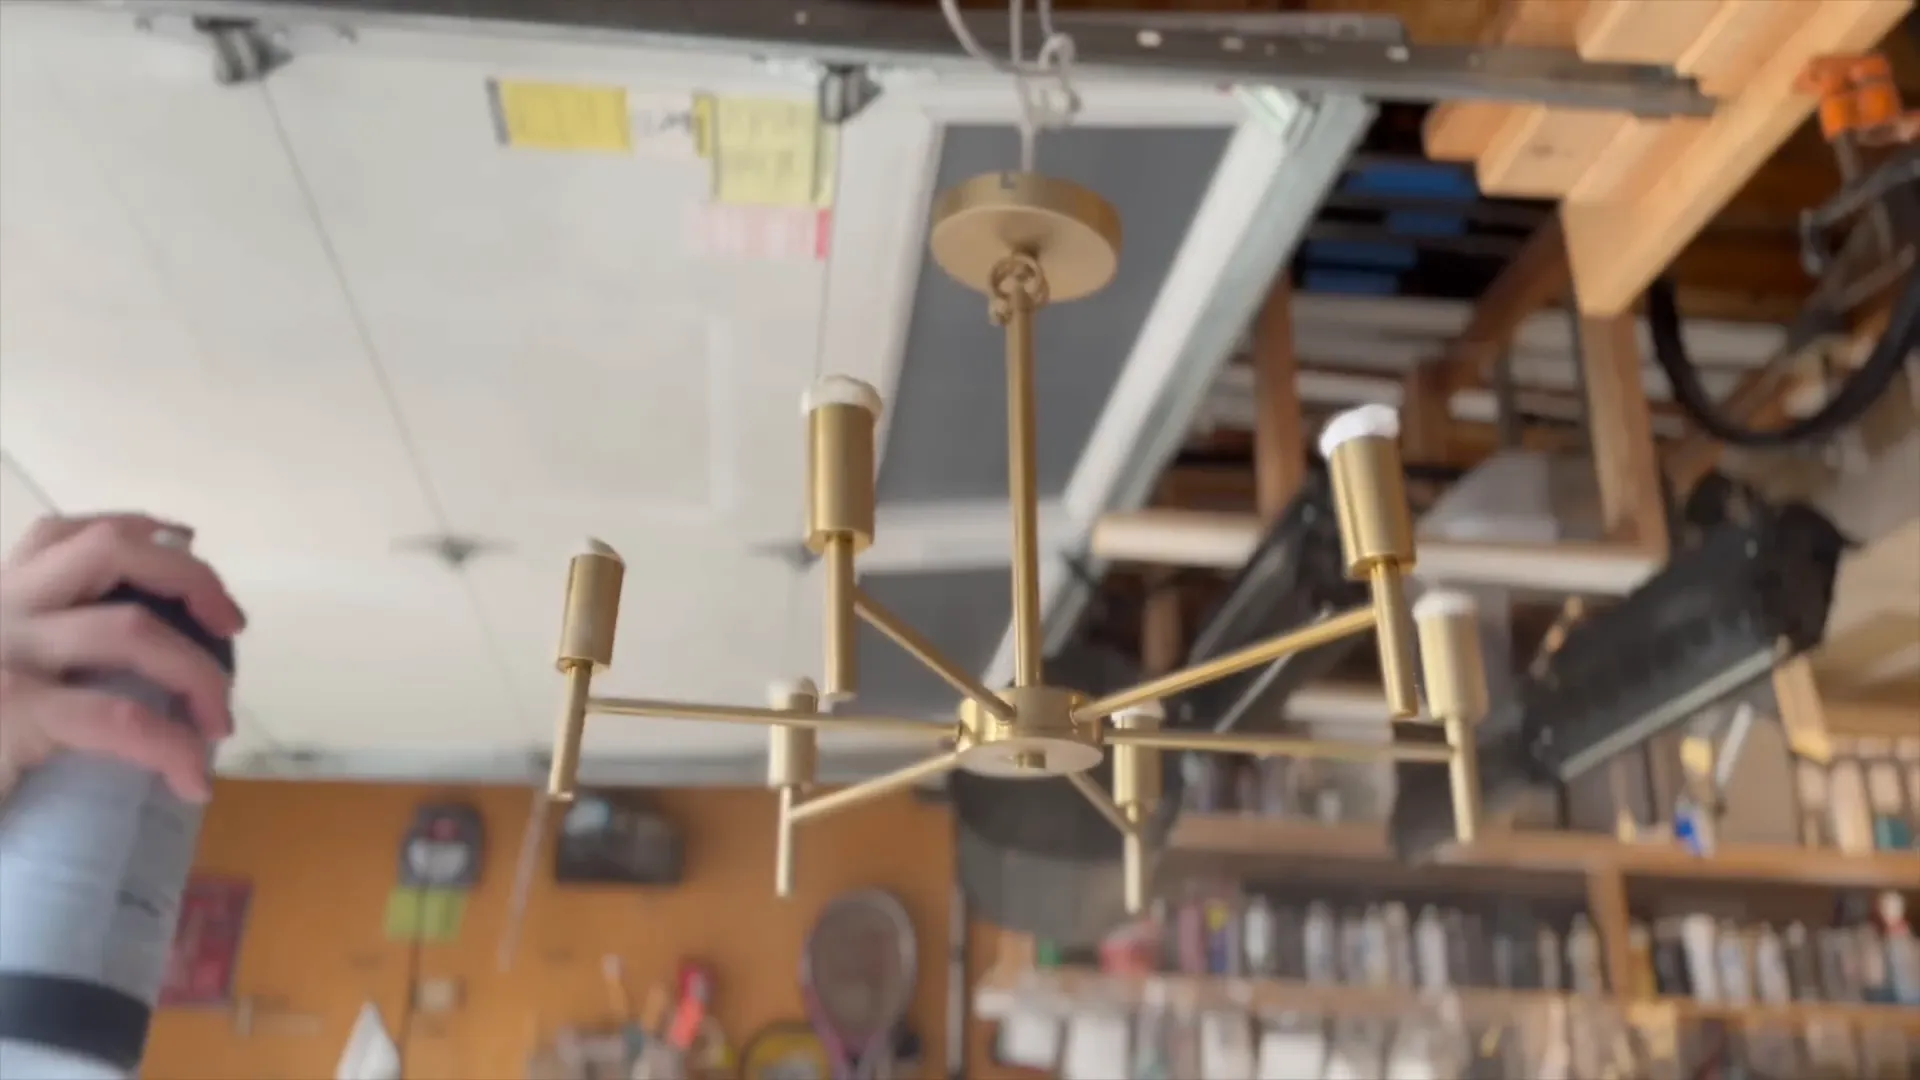
Choosing the Right Chandelier
Lighting can make or break a room’s ambiance. I purchased a chandelier from Amazon that was perfect in size and shape but had a brass finish that leaned a bit too orange for my taste. I aimed for a softer brushed brass look.
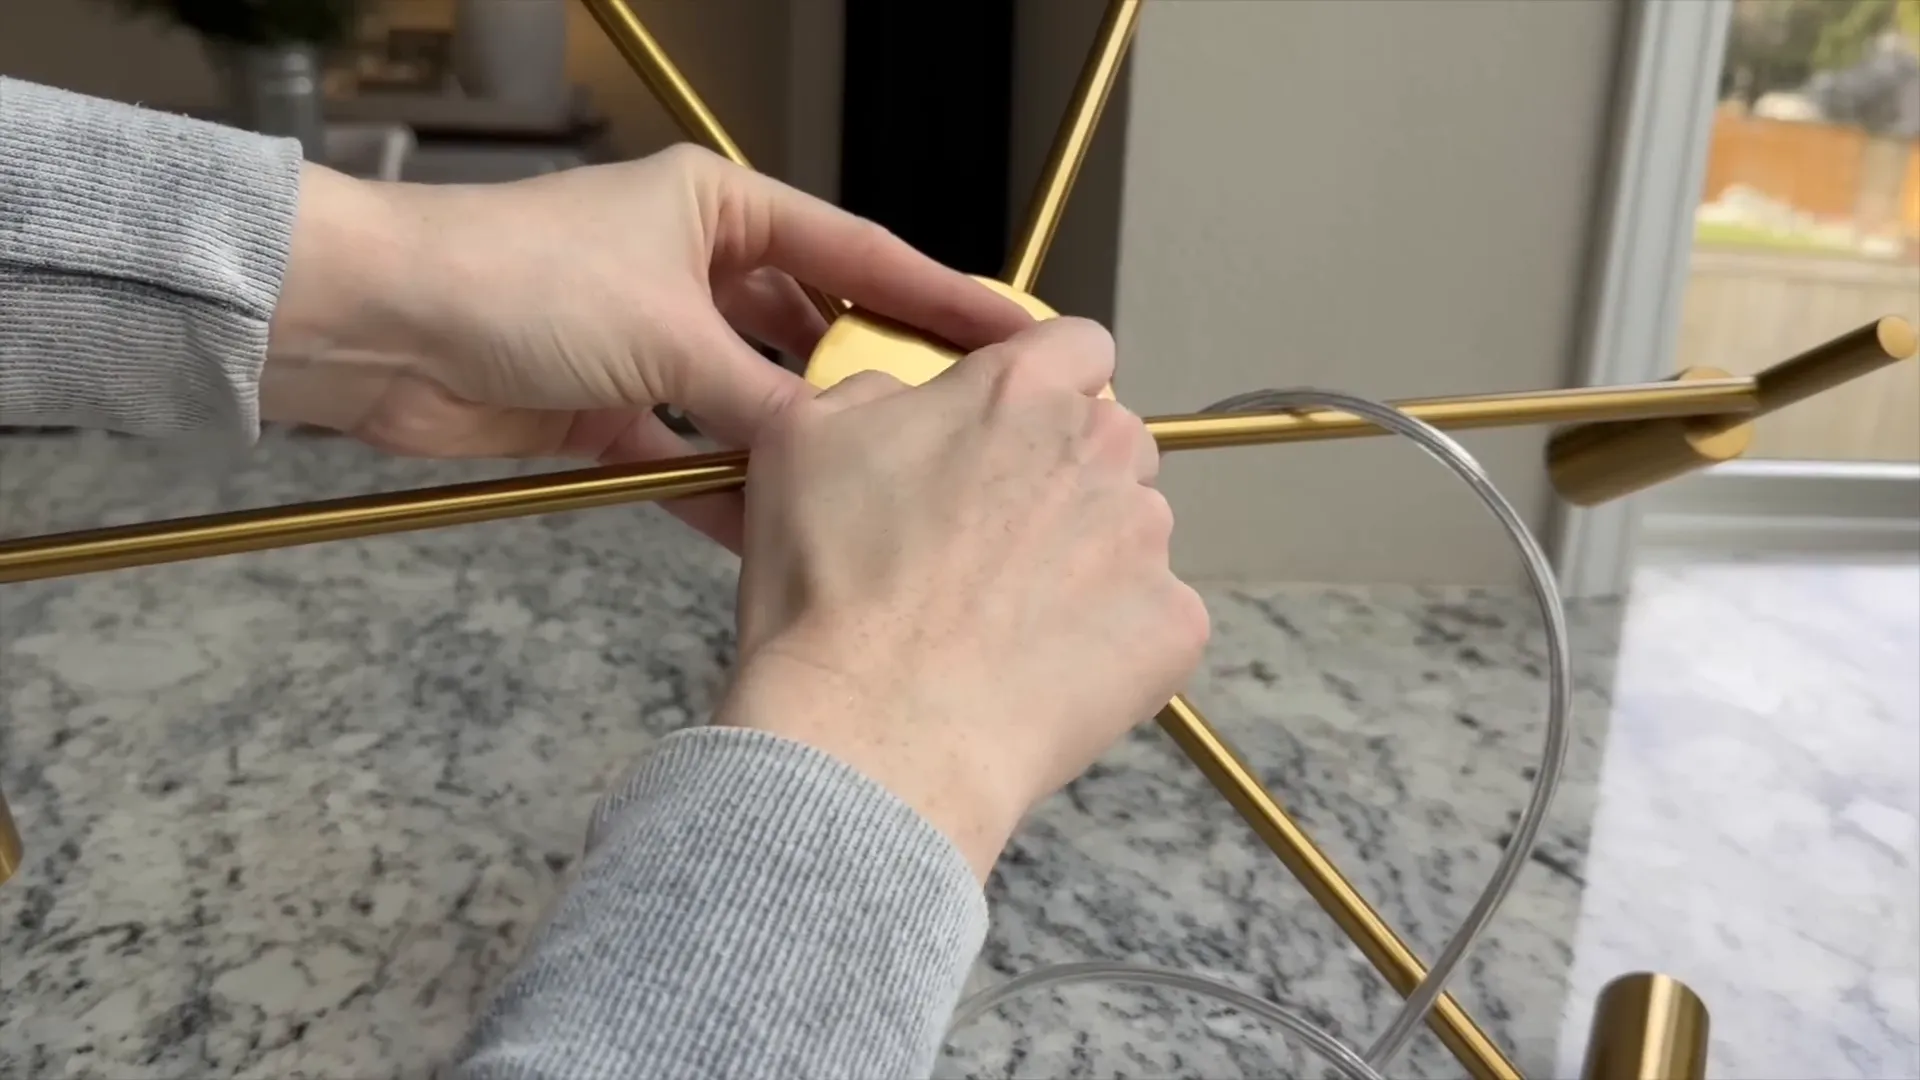
After some research, I found a spray paint that would give me the finish I desired. In hindsight, I could have saved money by purchasing a used chandelier and simply spray painting it. Lesson learned!
DIY Wall Art: Painting Over Canvas
One of my big finds was a framed canvas that didn’t quite fit my aesthetic but had the perfect size. I decided to transform it into a piece that better reflected my style.
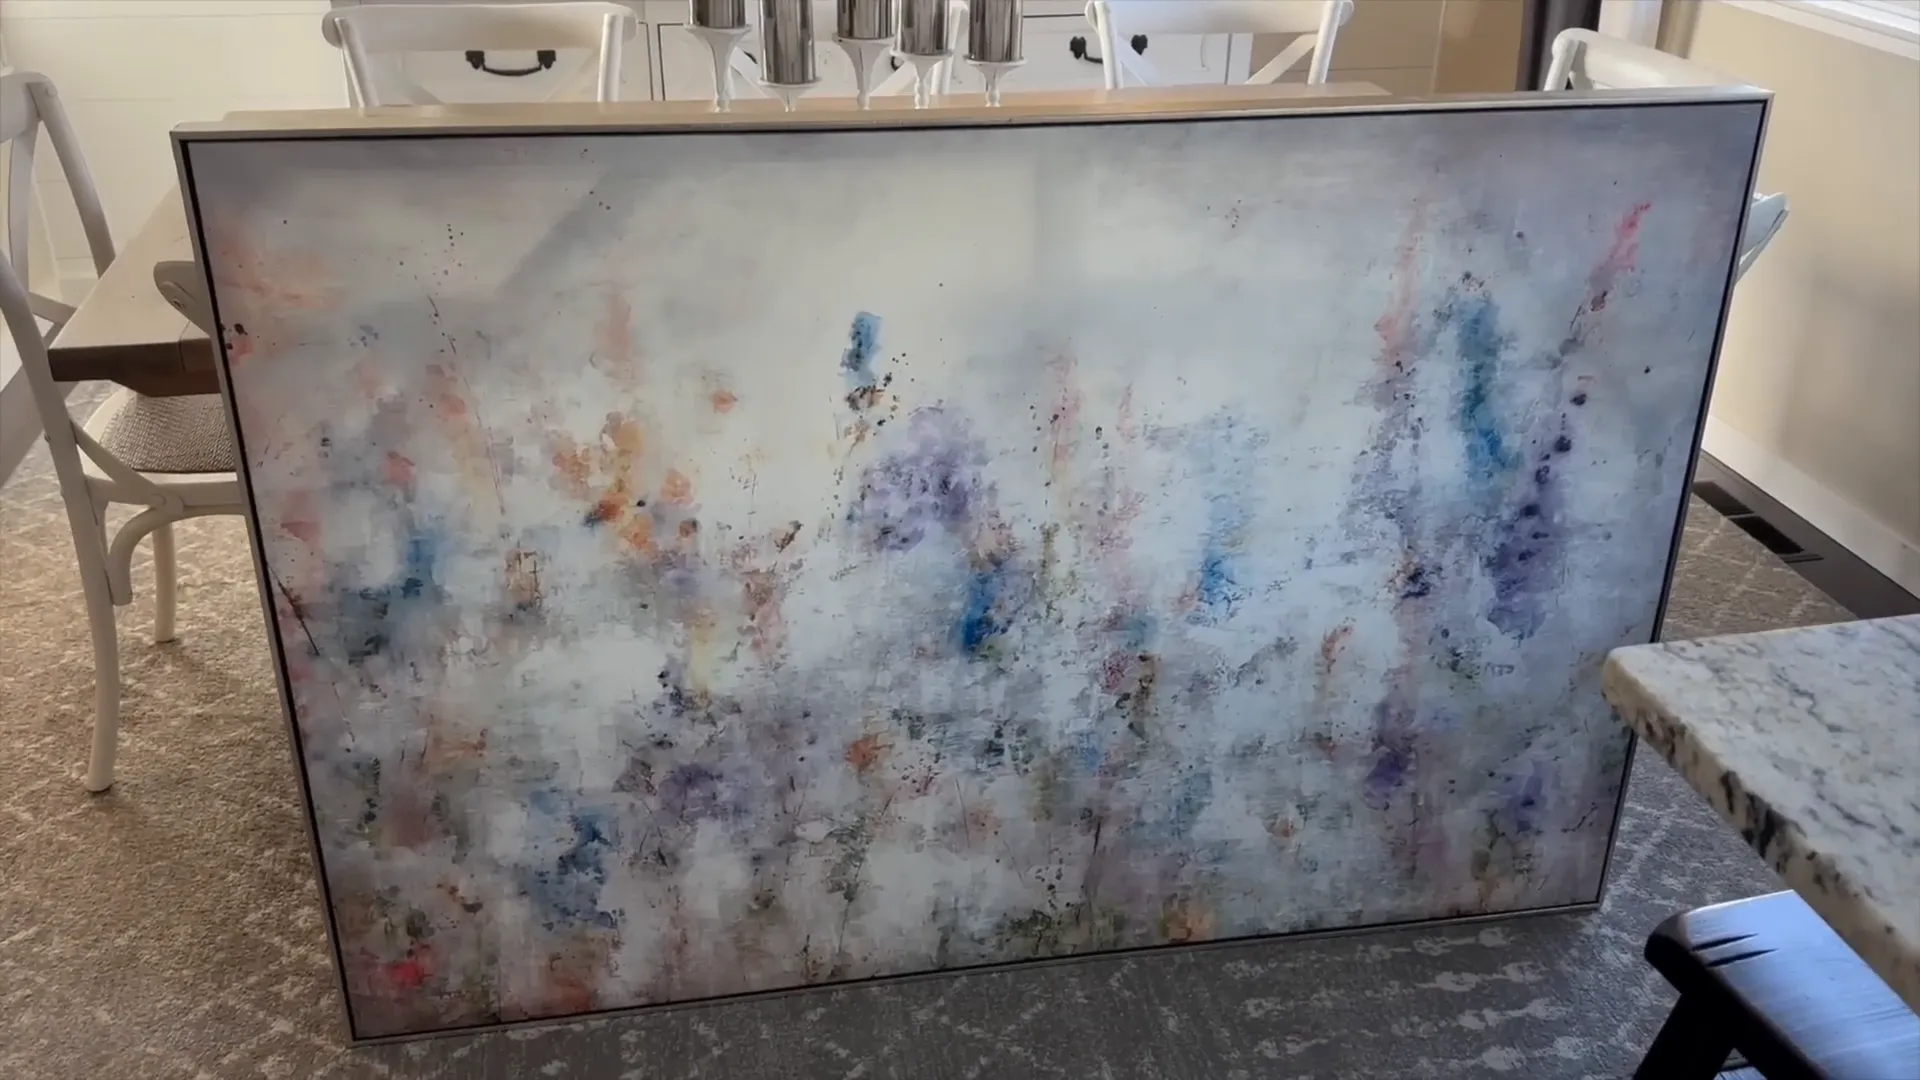
After applying two coats of primer and lightly sanding, I pulled up some inspiration photos. I’m not an artist, and I felt a bit intimidated, but I reminded myself that if it didn’t turn out as planned, I could always paint over it.

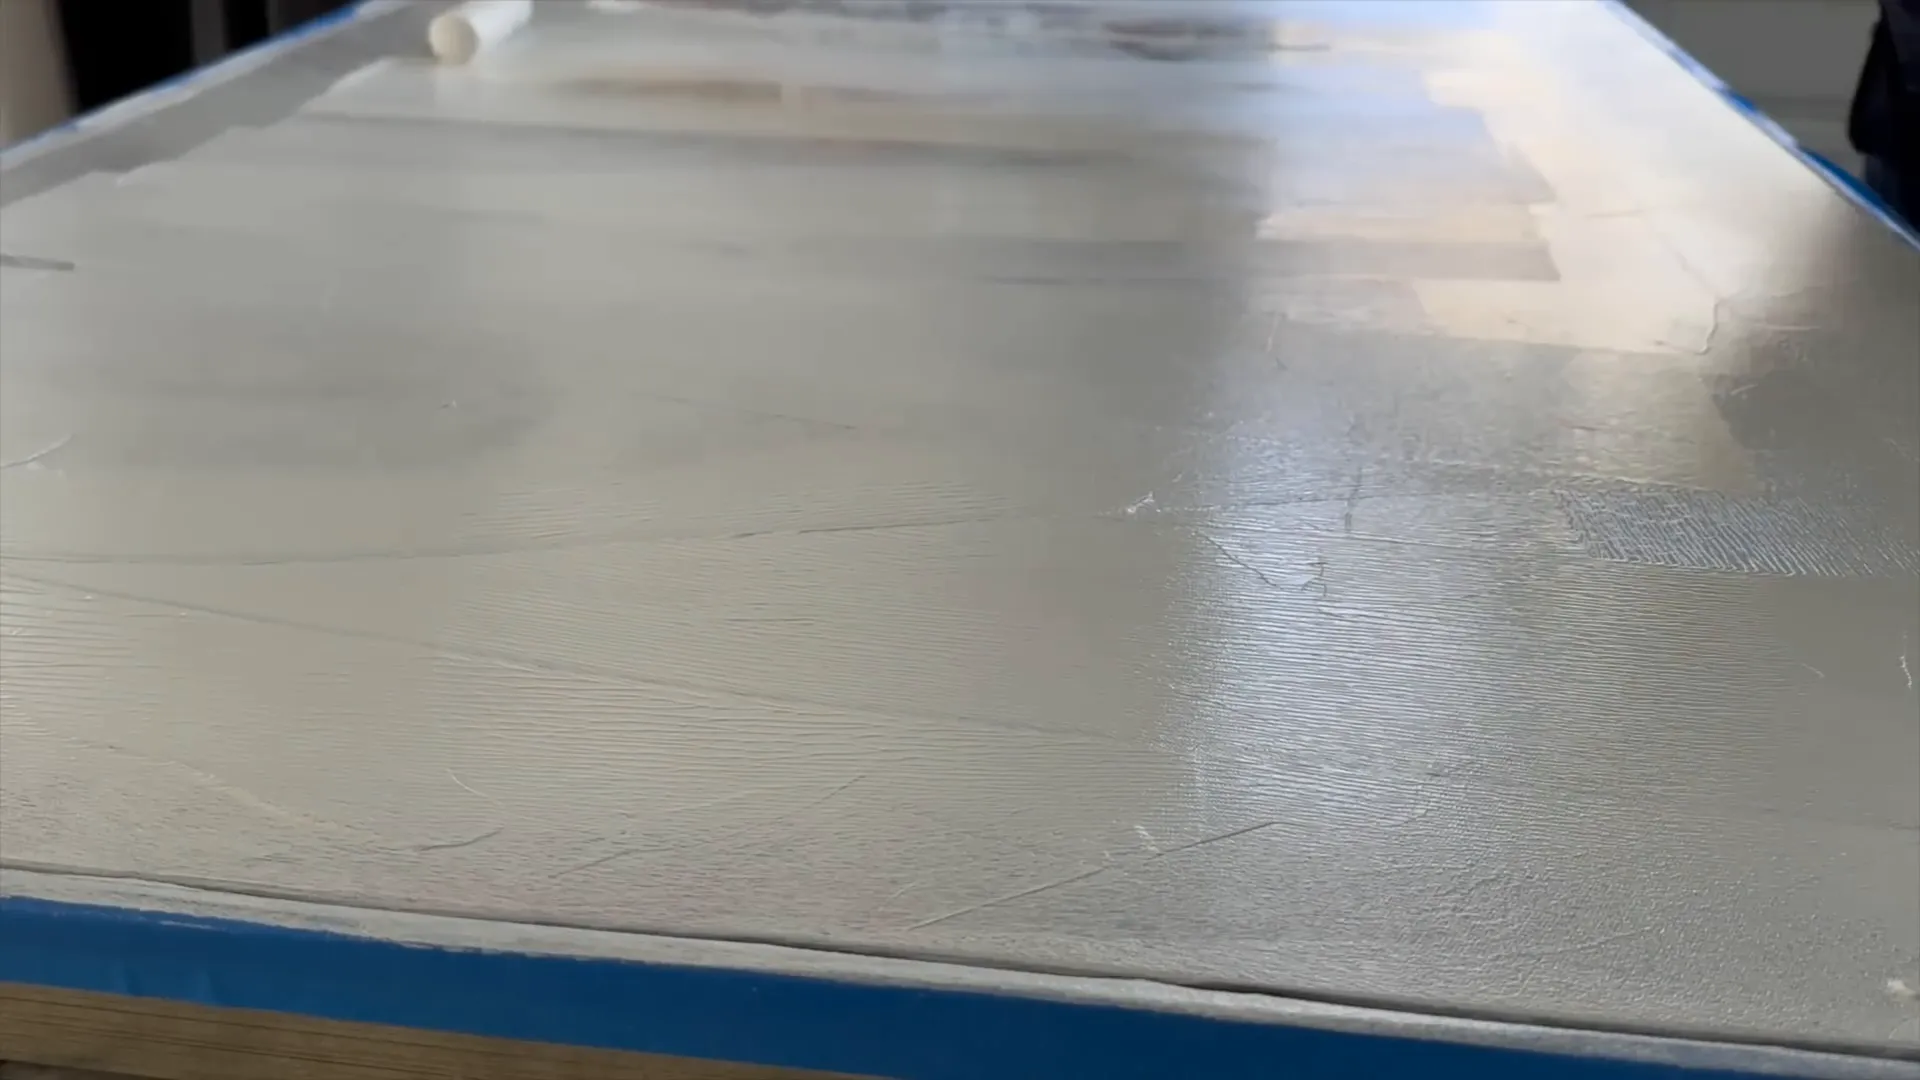
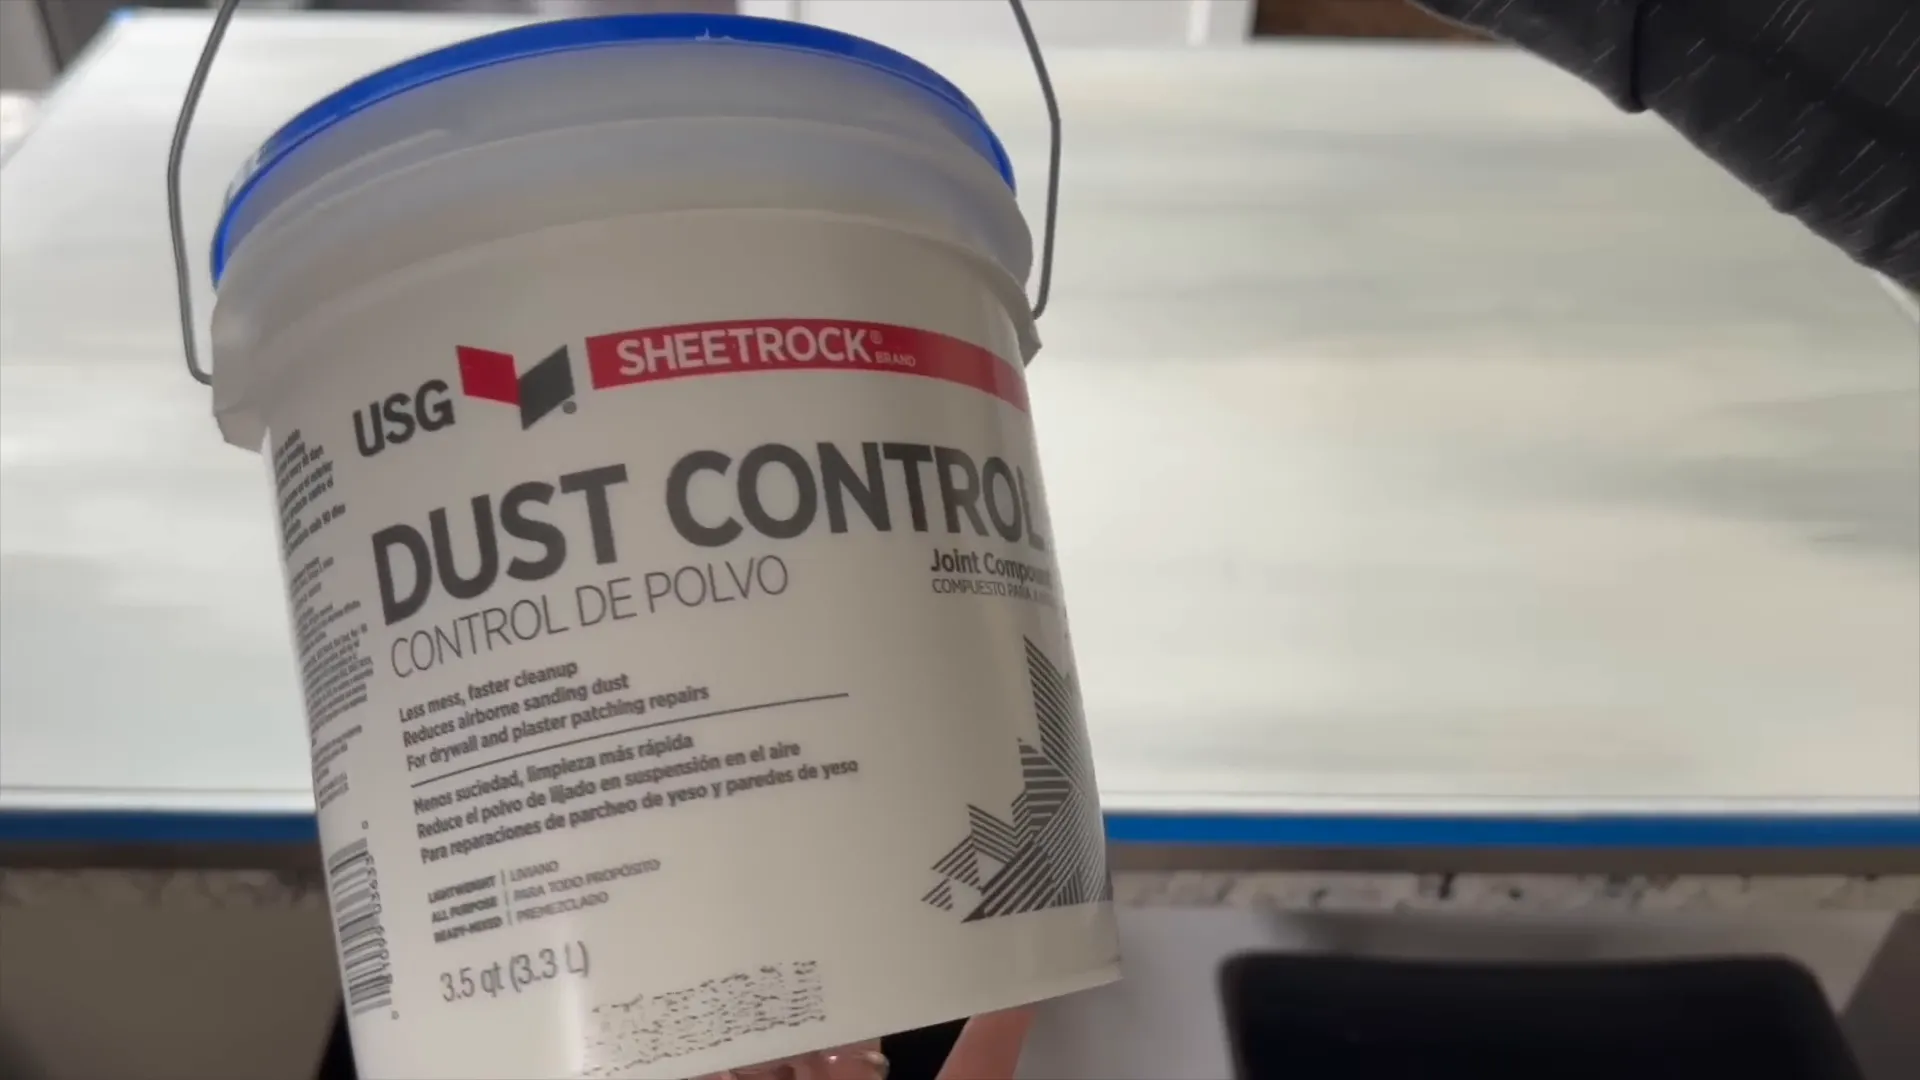
Using joint compound, I spread thin layers onto the canvas to add texture. I took my time with this step, experimenting until I felt satisfied with the result. Remember, it’s all about having fun and being creative!
Carpet Fix: Stretching Issues Explained
In our previous homes, we faced carpet stretching issues that can occur if the carpet isn’t power-stretched during installation. If you find yourself in a similar situation, restretching is an option you can hire out.
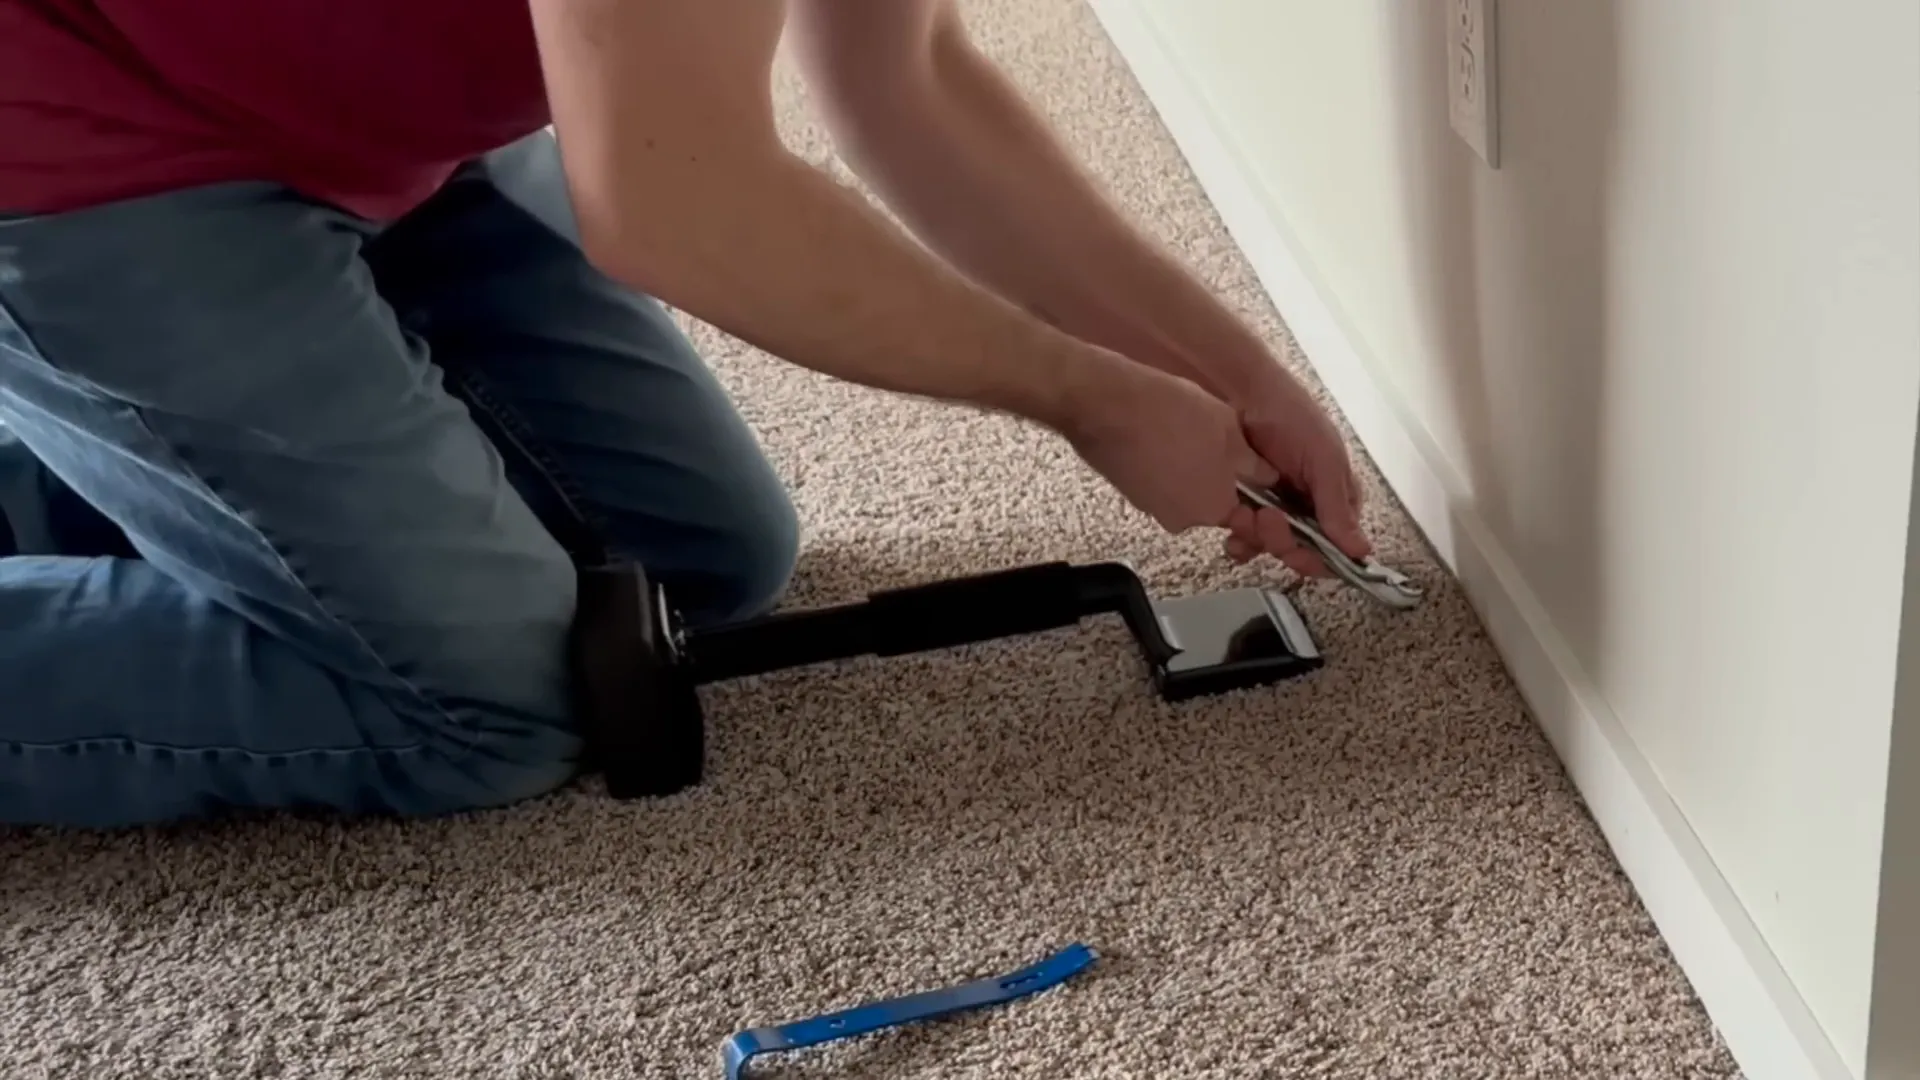
We found a tool that allowed us to tackle the job ourselves, and my husband was up for the challenge! Moving forward, we’ll ensure to use installers who prioritize power stretching to avoid this issue in the future.

The Benefits of a Washable Rug
Investing in a washable rug can be a game changer for your space. Not only does it add a layer of comfort and style, but it also offers practicality that traditional rugs can't match.
First, let's talk about maintenance. A washable rug means you can easily toss it in the washing machine, keeping your space clean and fresh without the hassle of professional cleaning. This is especially important if you have pets or kids who can be a bit messy!
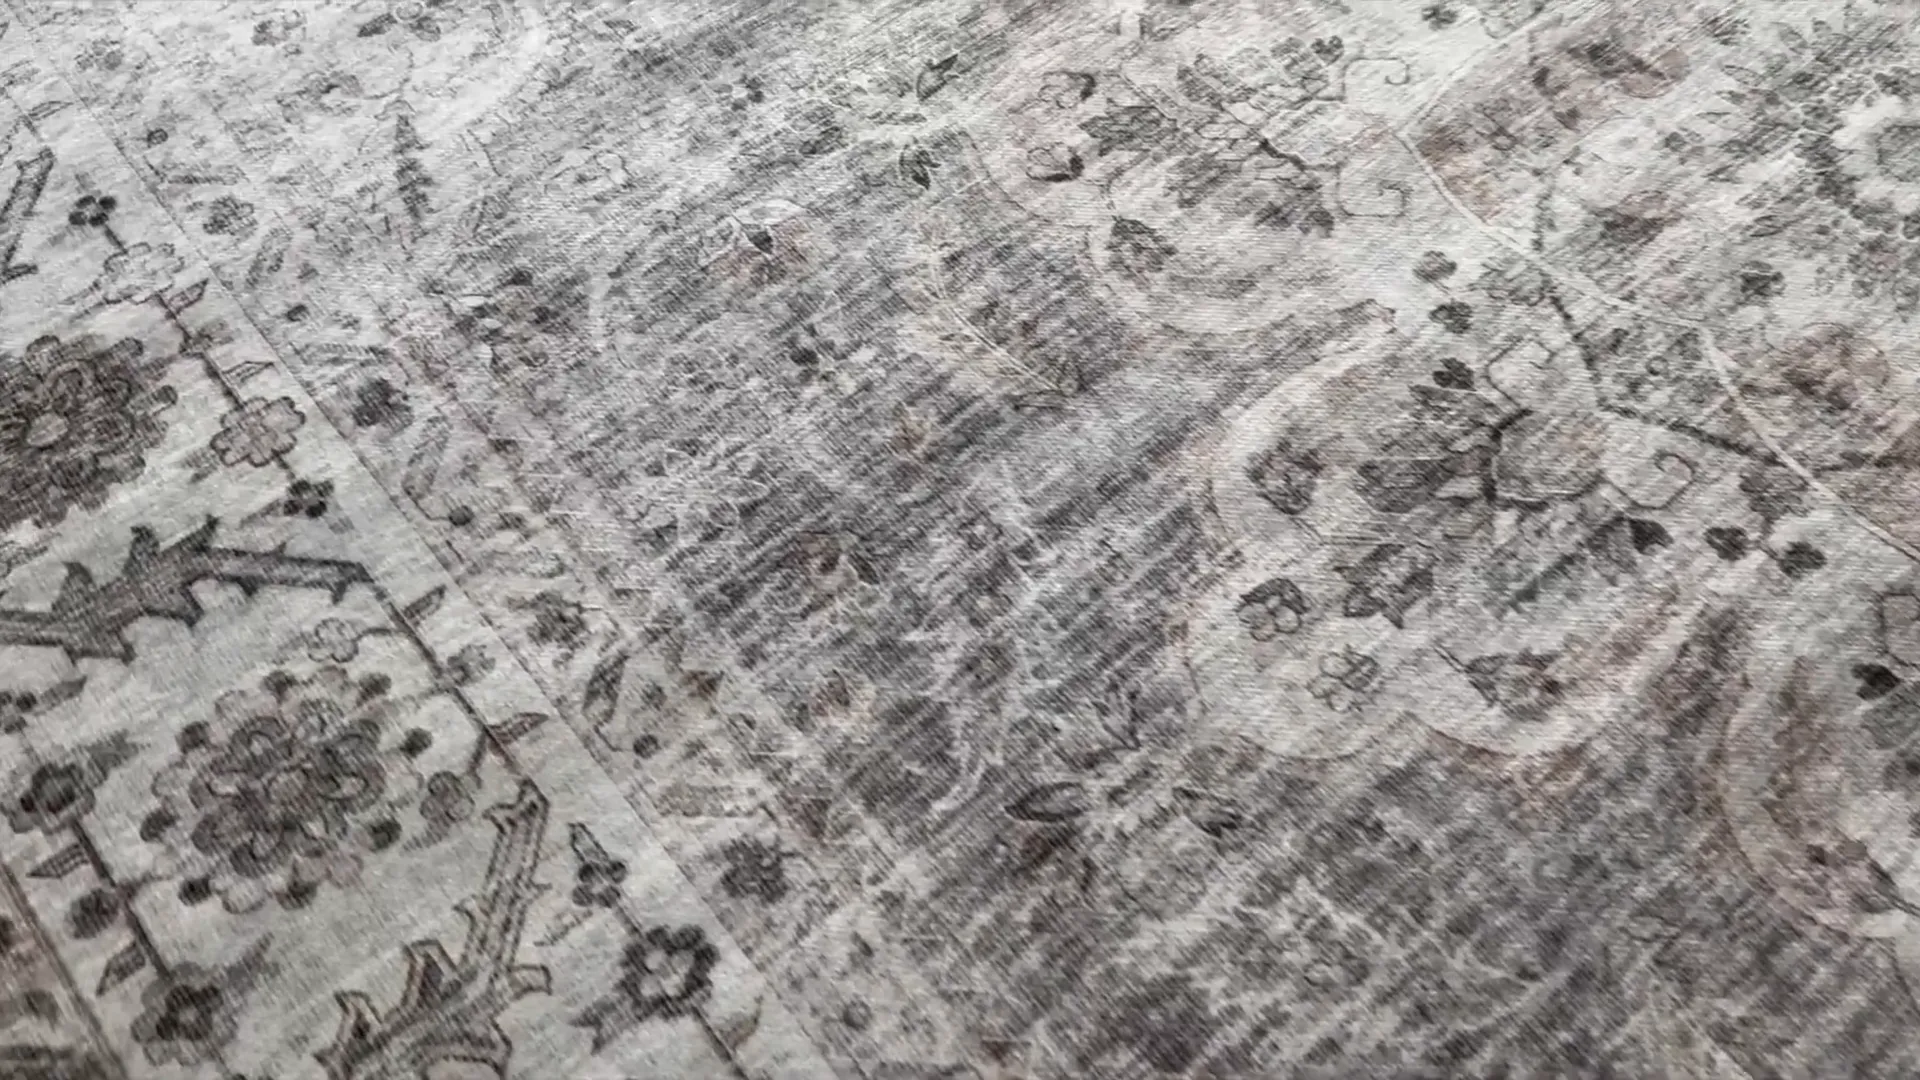
Additionally, a washable option allows you to switch up your decor without the fear of permanent stains. You can experiment with colors and patterns, knowing that you can always restore it to its original state with a simple wash.
Moreover, these rugs often come in various designs, making it easy to find one that fits your specific aesthetic. Whether you prefer modern, bohemian, or classic styles, there’s a washable rug out there for you!
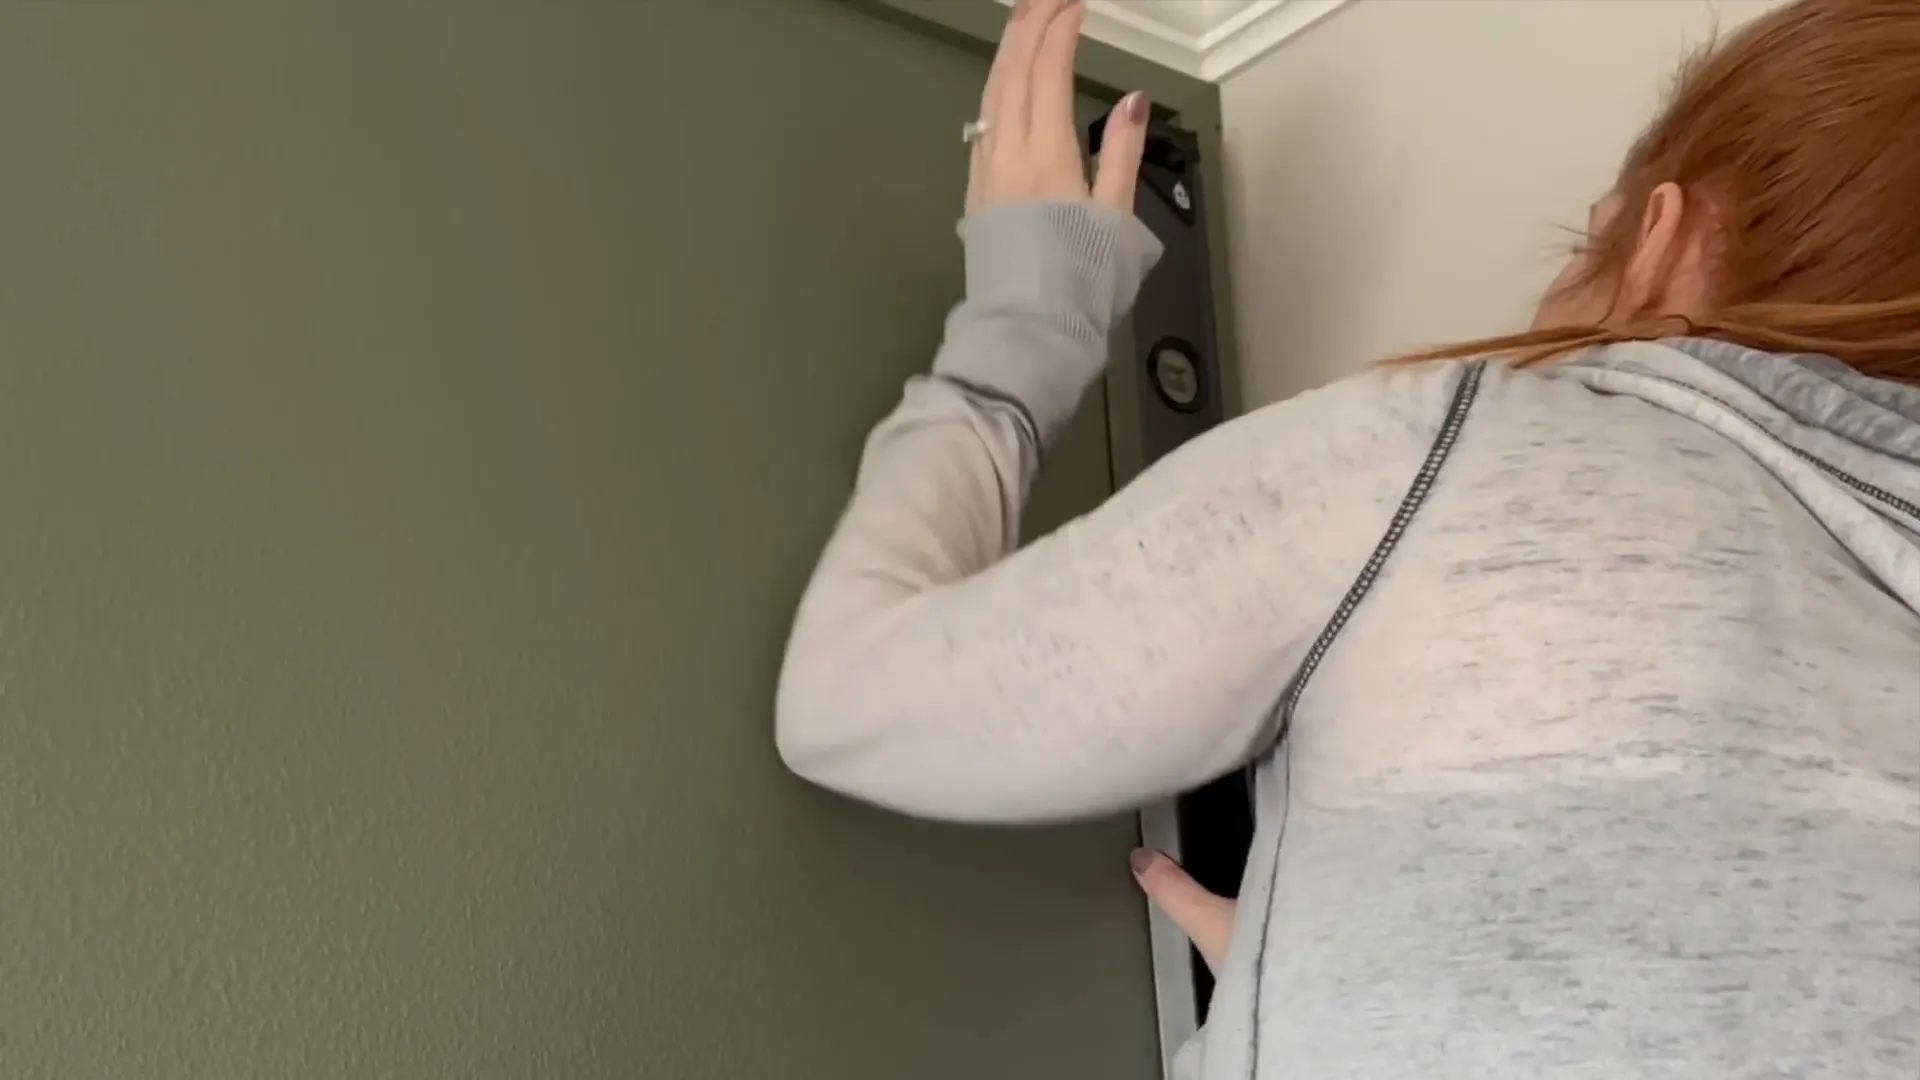
Hanging Pictures and Wall Art: Tips and Tricks
When it comes to hanging wall art, placement is key. Start by identifying where you want your art to go. A simple trick is to hold your finger on the wall to mark the spot for your first nail, ensuring you have a good visual of the placement.
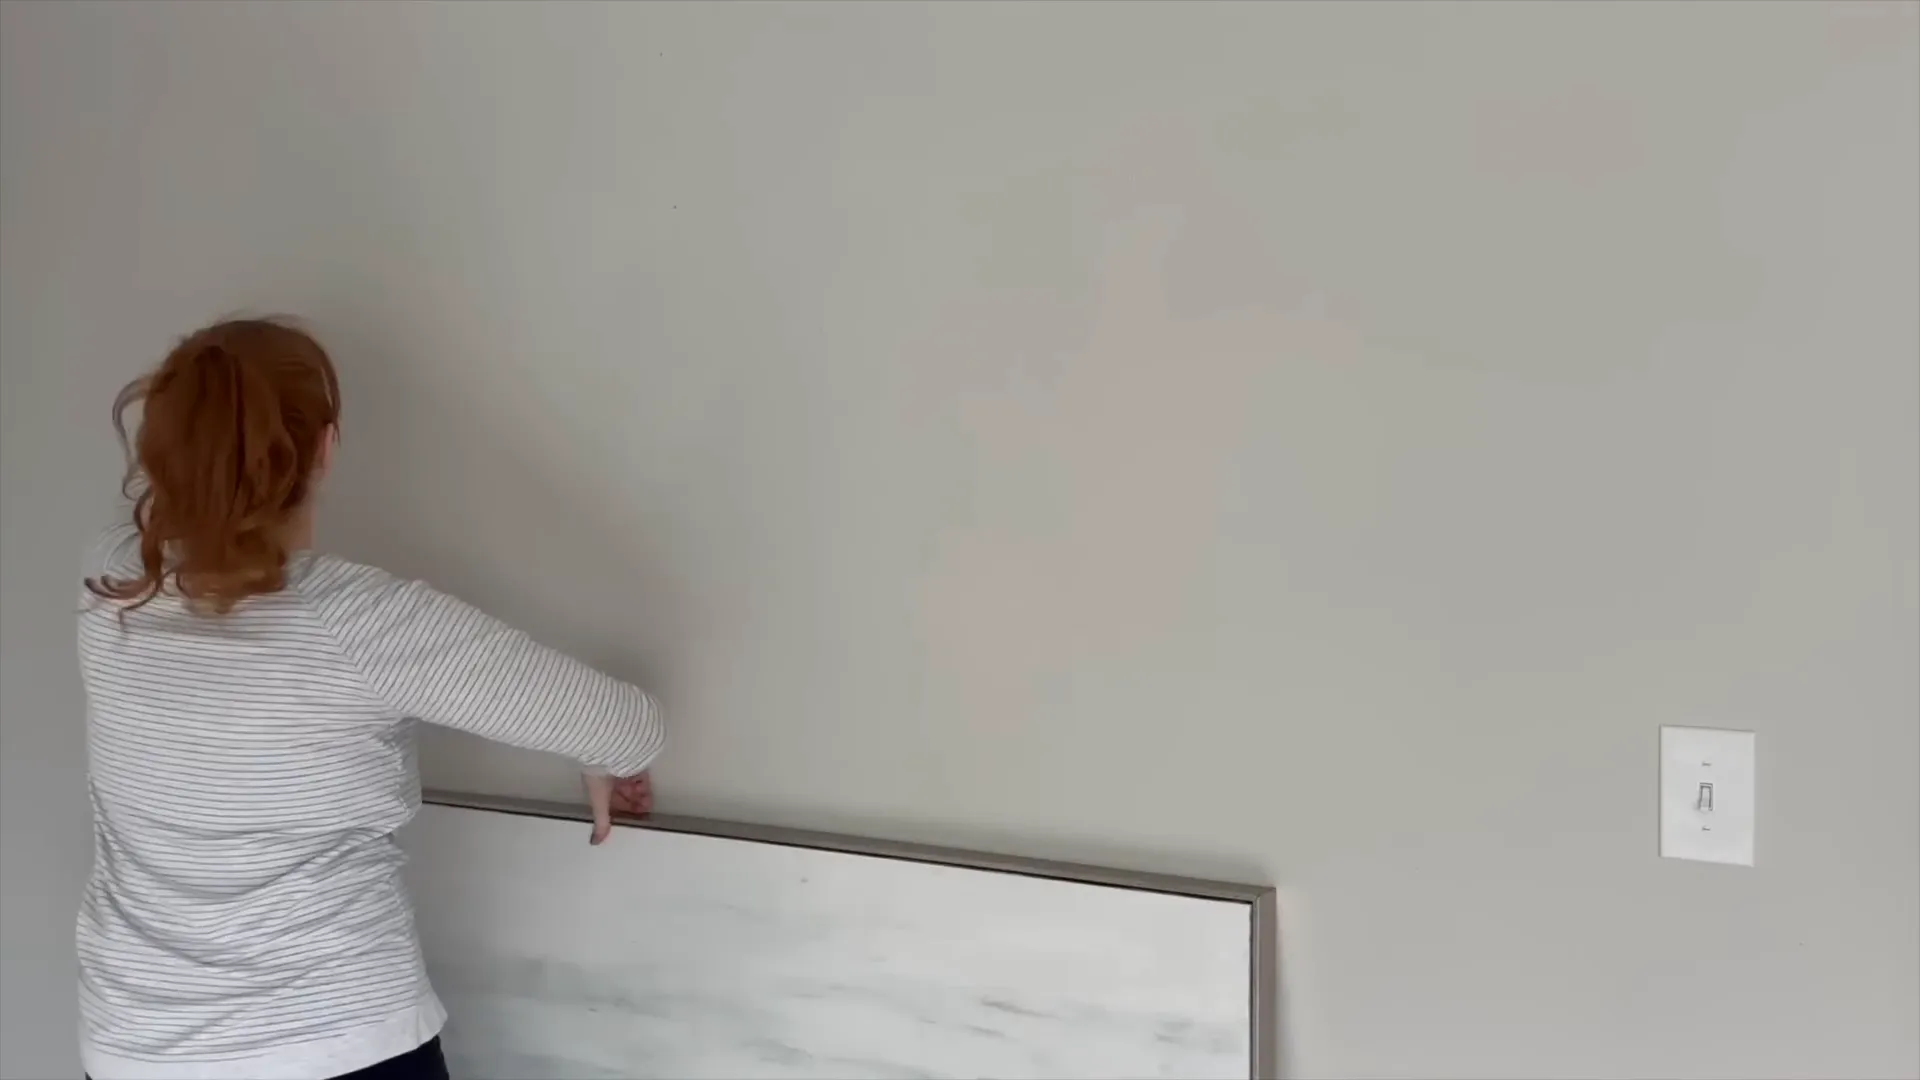
Next, use painter’s tape to measure the distance between loops or hanging points. This method ensures your pieces are evenly spaced and level. If you’re hanging something heavier, don’t forget to locate a stud or use drywall anchors for added support.
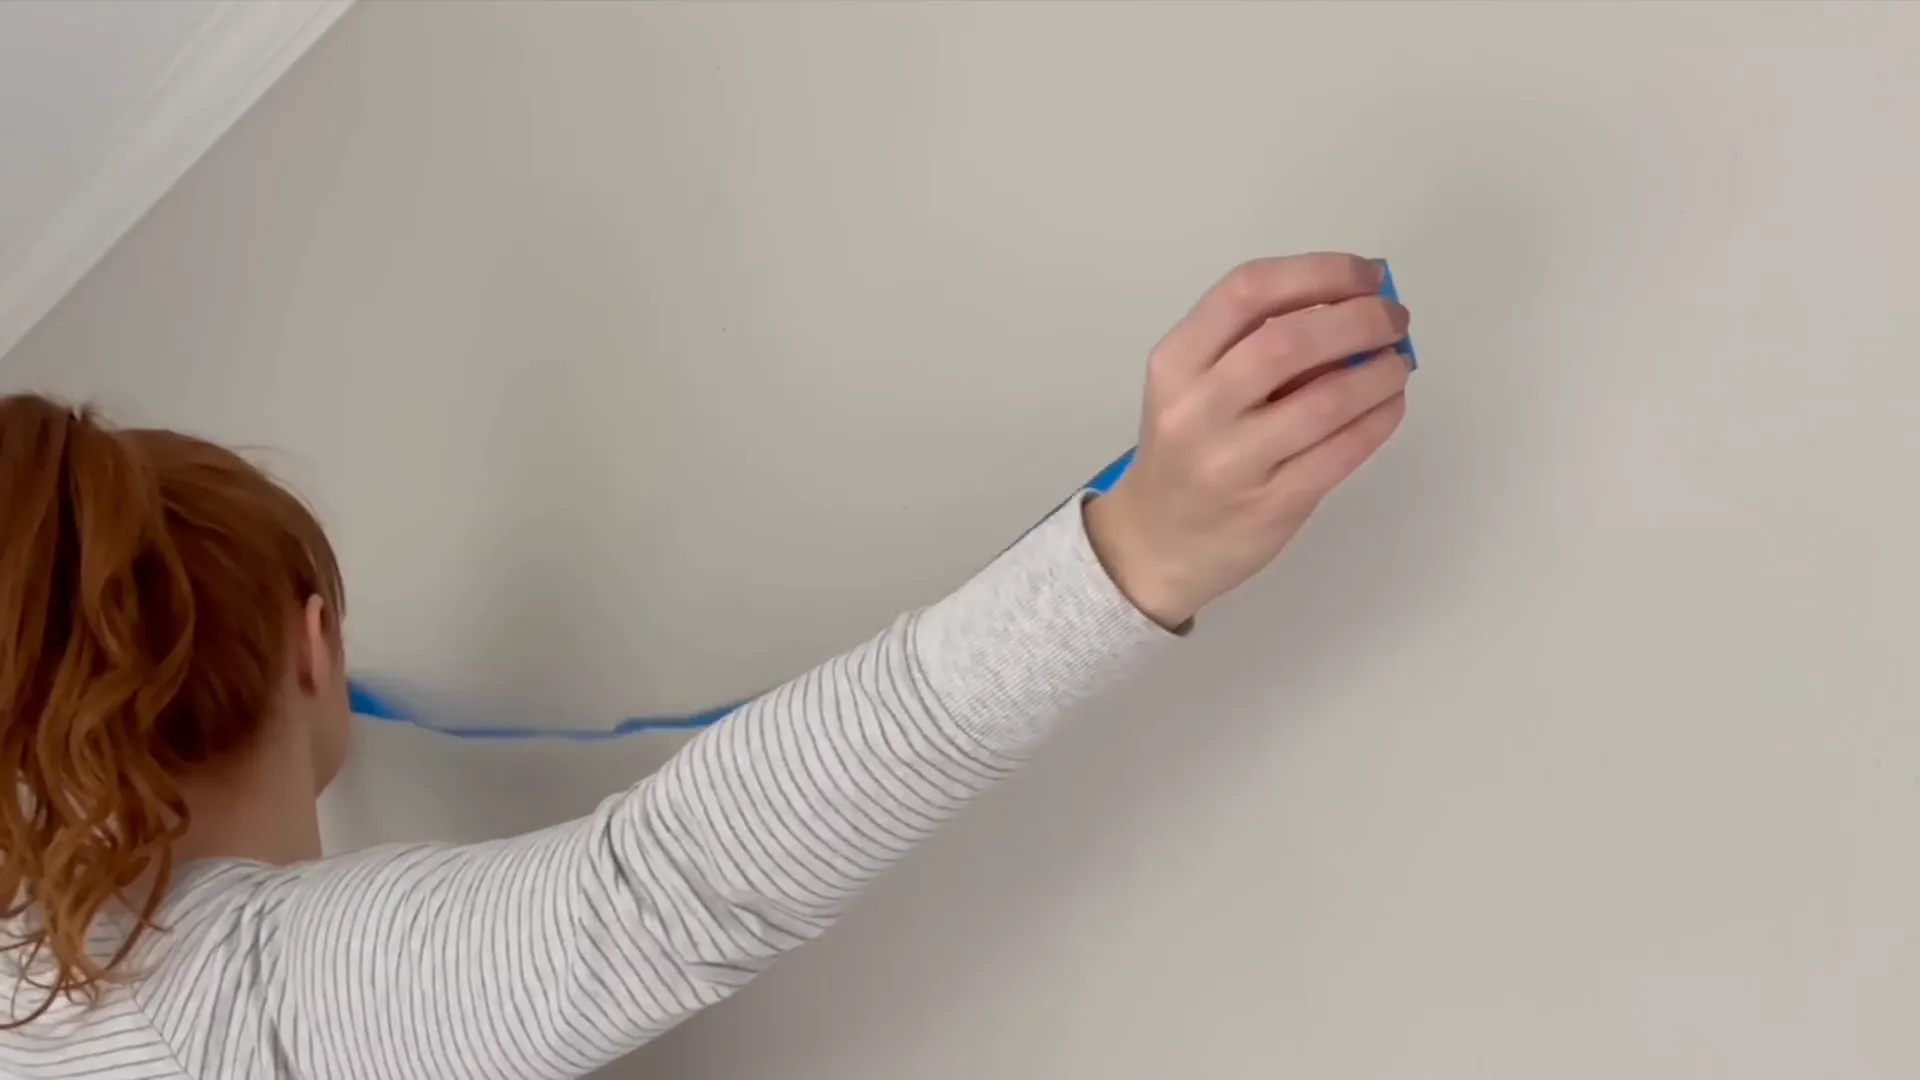
Lastly, consider the overall aesthetic. Mixing different frame styles and colors can create an eclectic gallery wall that draws the eye. Take your time to arrange your pieces on the floor before committing to the wall, allowing you to visualize the final look.
Decorative Tree Makeover: Wrapping Up the Look
Transforming a decorative tree can be a delightful project. Start with a base that suits your style; this could be an artificial tree or even branches you find outside. The key is to make it feel intentional and cohesive with your overall decor.

For added texture, consider using materials like Spanish moss or faux leaves, which can be easily attached with hot glue. This not only enhances the visual appeal but also adds depth to your arrangement.
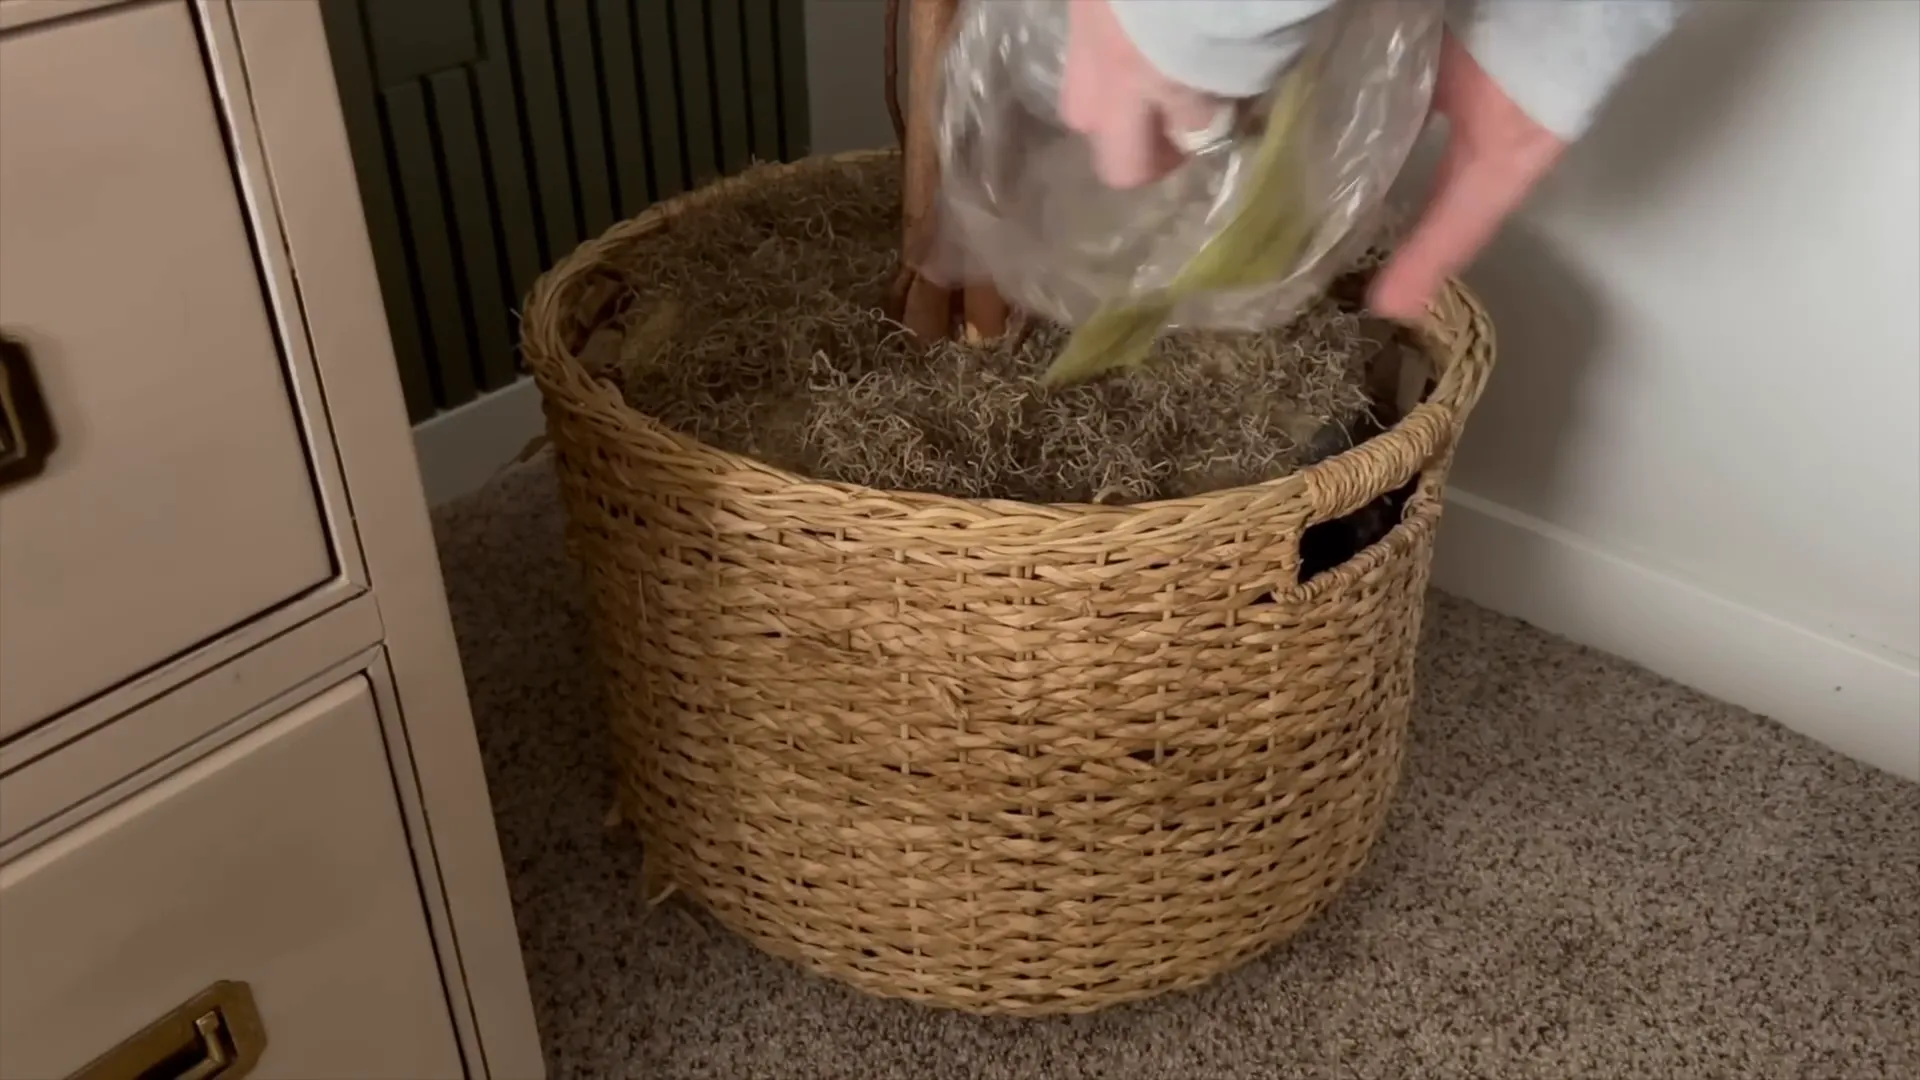
Once your tree is styled, place it in a prominent spot to serve as a focal point in the room. The warmth and life it brings can elevate the entire space, making it feel more inviting and cozy.
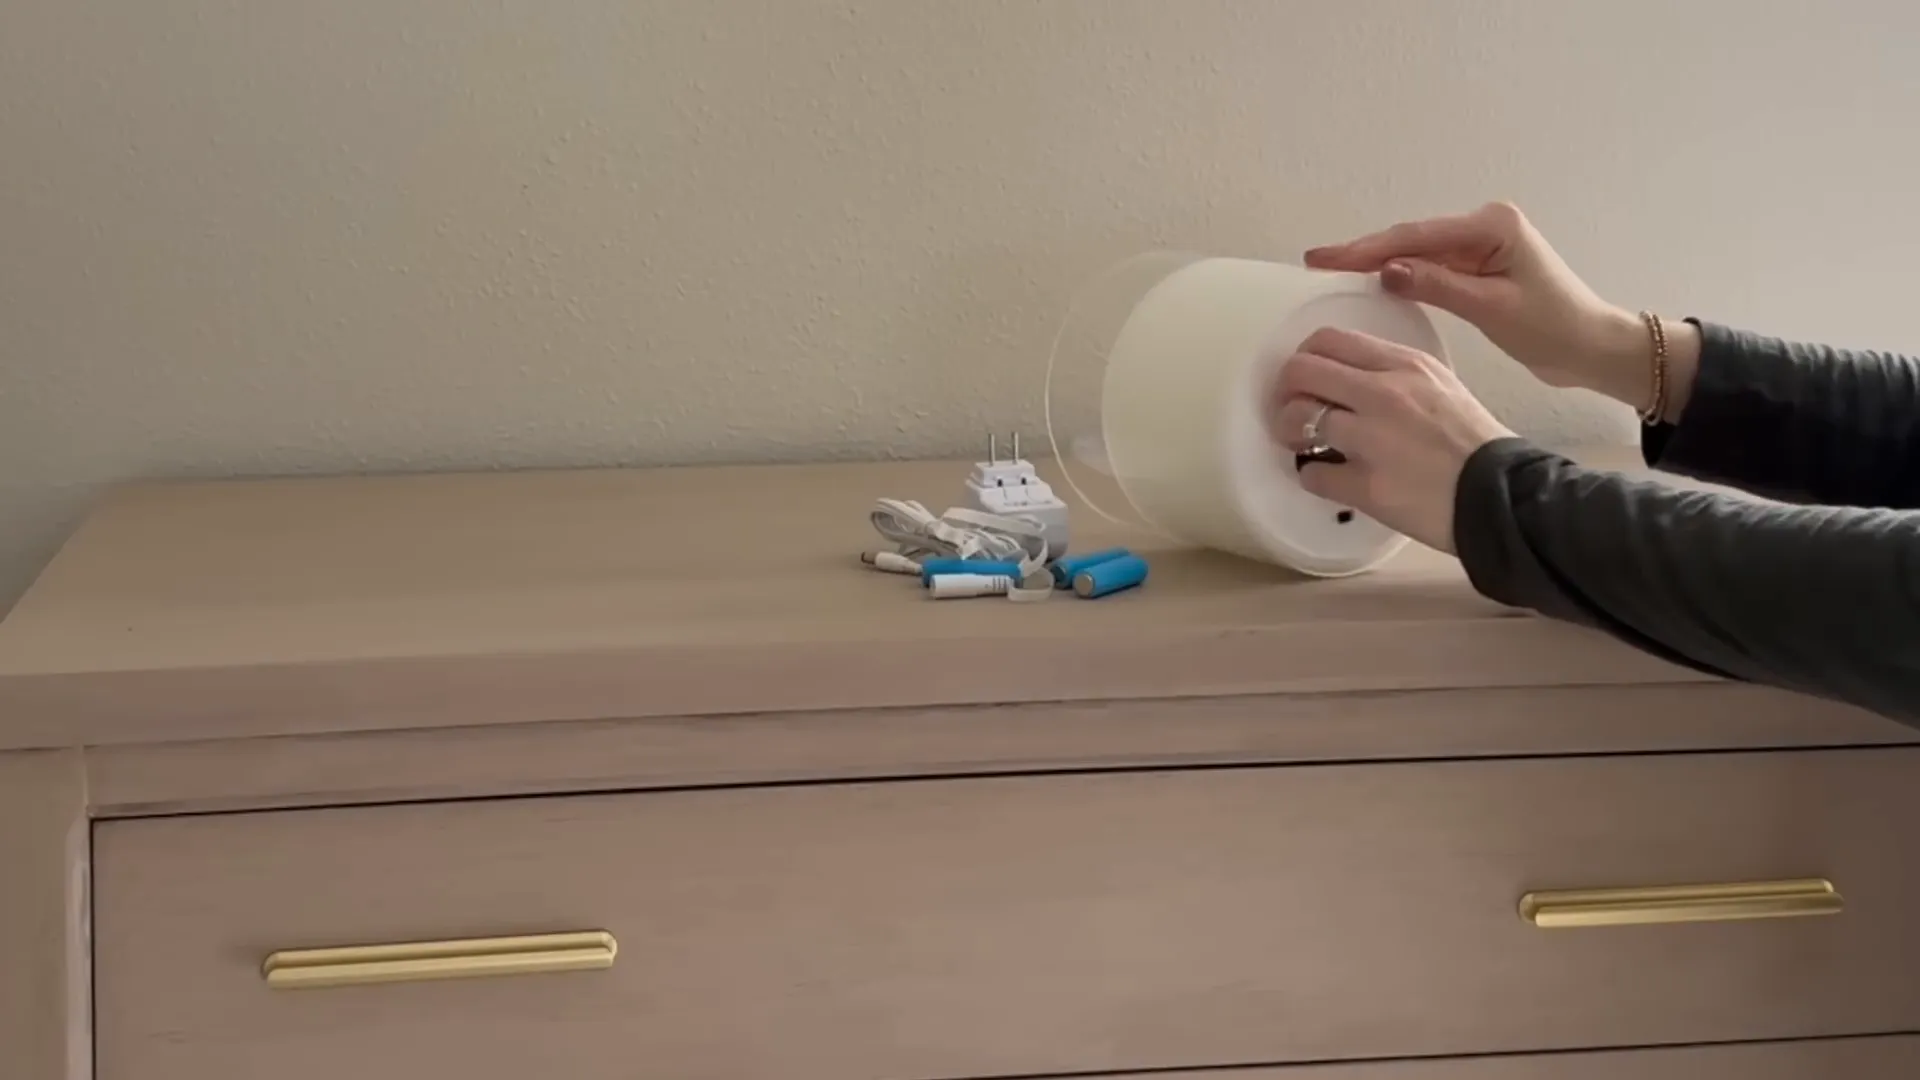
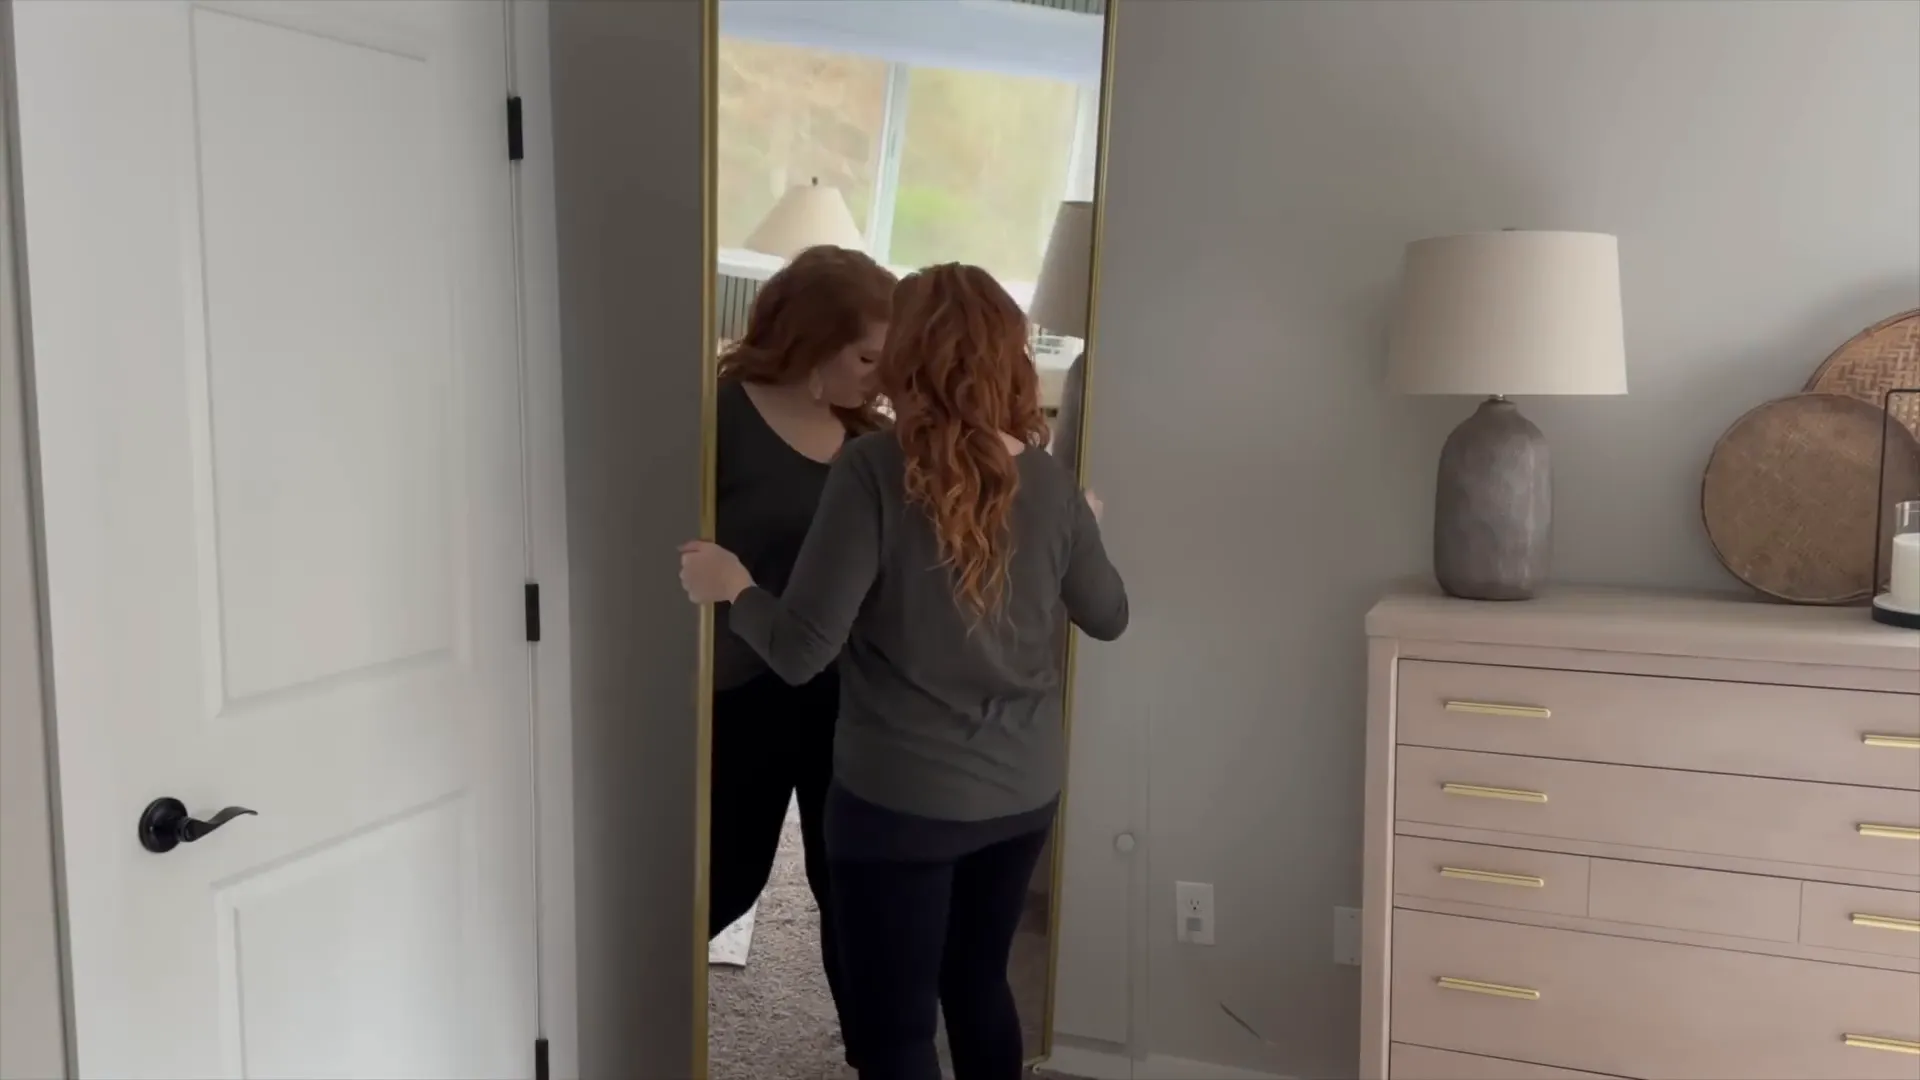
Final Touches: Decorating the Room
As you put the finishing touches on your room, think about the little elements that can make a big difference. Candles add warmth and ambiance, but if you have pets or children, battery-operated options are a great alternative.
Consider also the use of mirrors. They can make a room feel larger and brighter. Look for unique finds, perhaps from online marketplaces, where you can snag a beautiful piece for free or at a low cost.
Finally, don’t underestimate the power of textiles. Throw pillows, blankets, and even artfully draped fabric can bring a sense of comfort and style to your space.
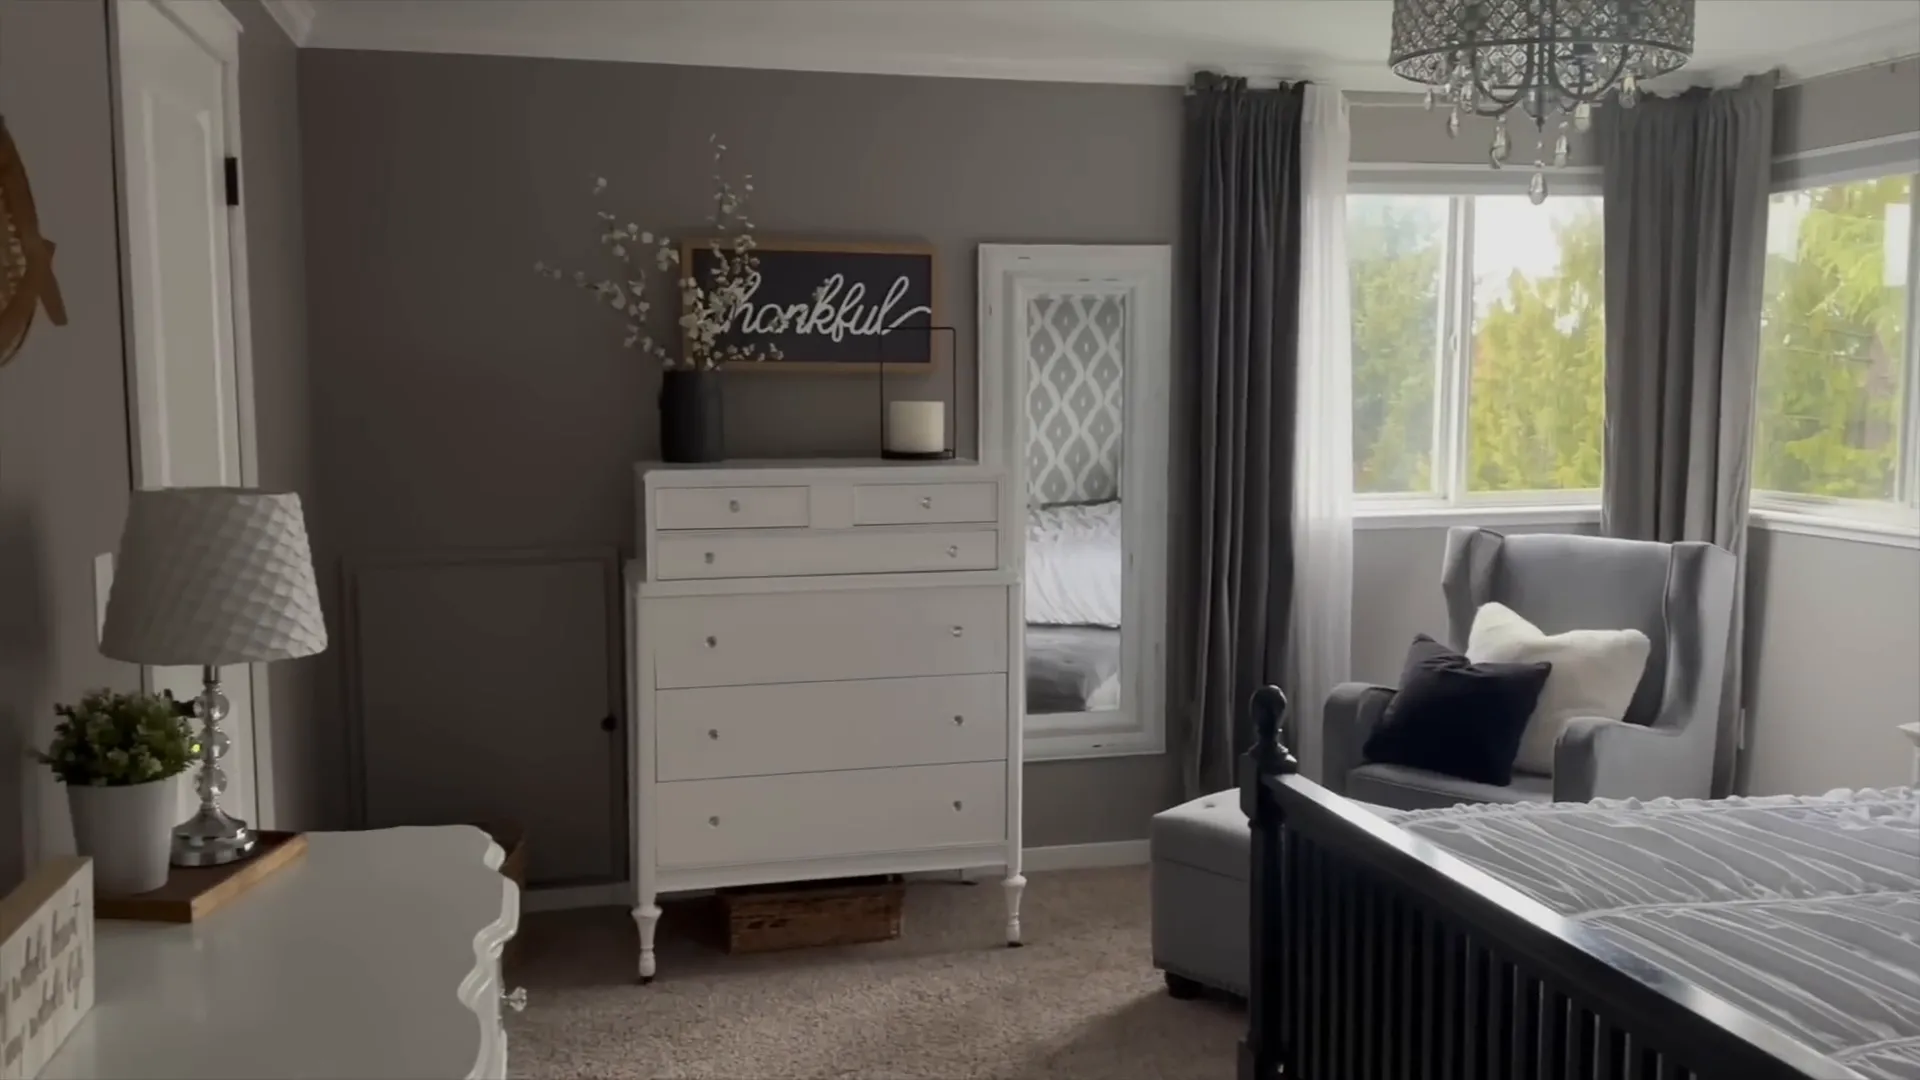
Before and After: The Stunning Transformation
Reflecting on the transformation of your room can be incredibly satisfying. Capturing the before and after photos allows you to appreciate the hard work that went into your makeover.
From a cluttered, uninspired space to a cozy, thoughtfully designed retreat, the changes can be striking. It’s all about the details—each piece contributing to the overall feel of the room.
Remember, this journey is about creating a space that feels uniquely yours. Celebrate each step of the process, and don’t hesitate to share your transformation with others!
FAQs: Your Questions Answered
What type of rug is best for high-traffic areas?
For high-traffic areas, consider a durable, washable rug made from synthetic fibers. These materials are often more resilient and easier to clean.
How do I ensure my wall art stays level?
Using painter's tape to measure the distance between hanging points is a great strategy. Additionally, a level tool can help ensure everything is straight.
Can I mix different styles of wall art?
Absolutely! Mixing styles can create a dynamic gallery wall. Just be sure to maintain a cohesive color palette for a more unified look.
What are some budget-friendly ways to decorate?
Thrift stores and online marketplaces are fantastic resources for budget-friendly decor. Look for unique pieces that can be easily transformed to fit your style.


0 Comments